
|
|
|
 在 GitHub 上檢視原始碼 在 GitHub 上檢視原始碼
|
|
總覽
本教學課程示範資料擴增:這項技術可透過套用隨機 (但符合實際情況) 轉換 (例如圖片旋轉),來增加訓練集的多元性。
您將學習如何透過兩種方式套用資料擴增
- 使用 Keras 預先處理層級,例如
tf.keras.layers.Resizing、tf.keras.layers.Rescaling、tf.keras.layers.RandomFlip和tf.keras.layers.RandomRotation。 - 使用
tf.image方法,例如tf.image.flip_left_right、tf.image.rgb_to_grayscale、tf.image.adjust_brightness、tf.image.central_crop和tf.image.stateless_random*。
設定
import matplotlib.pyplot as plt
import numpy as np
import tensorflow as tf
import tensorflow_datasets as tfds

from tensorflow.keras import layers
2024-02-15 02:21:03.189917: E external/local_xla/xla/stream_executor/cuda/cuda_dnn.cc:9261] Unable to register cuDNN factory: Attempting to register factory for plugin cuDNN when one has already been registered
2024-02-15 02:21:03.189965: E external/local_xla/xla/stream_executor/cuda/cuda_fft.cc:607] Unable to register cuFFT factory: Attempting to register factory for plugin cuFFT when one has already been registered
2024-02-15 02:21:03.191420: E external/local_xla/xla/stream_executor/cuda/cuda_blas.cc:1515] Unable to register cuBLAS factory: Attempting to register factory for plugin cuBLAS when one has already been registered
下載資料集
本教學課程使用 tf_flowers 資料集。為了方便起見,請使用 TensorFlow Datasets 下載資料集。如果您想瞭解其他匯入資料的方式,請參閱載入圖片教學課程。
(train_ds, val_ds, test_ds), metadata = tfds.load(
    'tf_flowers',
    split=['train[:80%]', 'train[80%:90%]', 'train[90%:]'],
    with_info=True,
    as_supervised=True,
)
flowers 資料集有五個類別。
num_classes = metadata.features['label'].num_classes
print(num_classes)
5
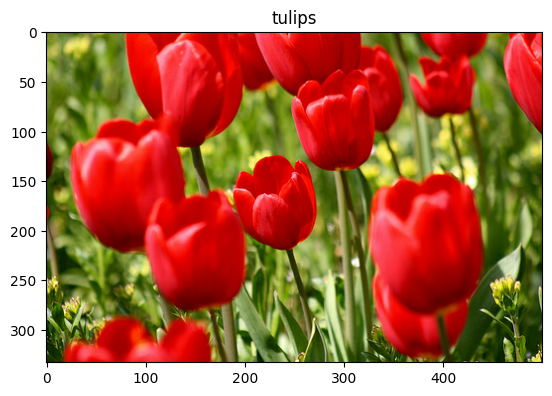
讓我們從資料集擷取圖片,並使用它來示範資料擴增。
get_label_name = metadata.features['label'].int2str

image, label = next(iter(train_ds))
_ = plt.imshow(image)
_ = plt.title(get_label_name(label))
2024-02-15 02:21:09.759464: W tensorflow/core/kernels/data/cache_dataset_ops.cc:858] The calling iterator did not fully read the dataset being cached. In order to avoid unexpected truncation of the dataset, the partially cached contents of the dataset will be discarded. This can happen if you have an input pipeline similar to `dataset.cache().take(k).repeat()`. You should use `dataset.take(k).cache().repeat()` instead.
使用 Keras 預先處理層級
調整大小和重新調整比例
您可以使用 Keras 預先處理層級,將圖片調整為一致的形狀 (使用 tf.keras.layers.Resizing),並重新調整像素值比例 (使用 tf.keras.layers.Rescaling)。
IMG_SIZE = 180

resize_and_rescale = tf.keras.Sequential([
  layers.Resizing(IMG_SIZE, IMG_SIZE),
  layers.Rescaling(1./255)
])
您可以將這些層級套用至圖片,藉此視覺化結果。
result = resize_and_rescale(image)
_ = plt.imshow(result)
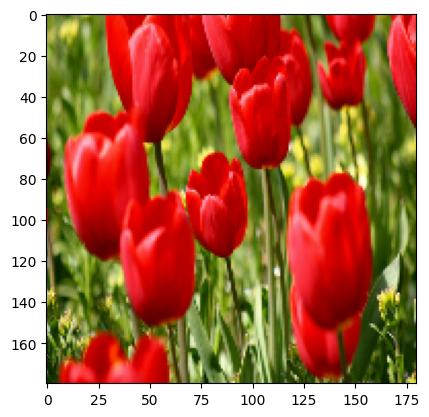
驗證像素是否在 [0, 1] 範圍內
print("Min and max pixel values:", result.numpy().min(), result.numpy().max())
Min and max pixel values: 0.0 1.0
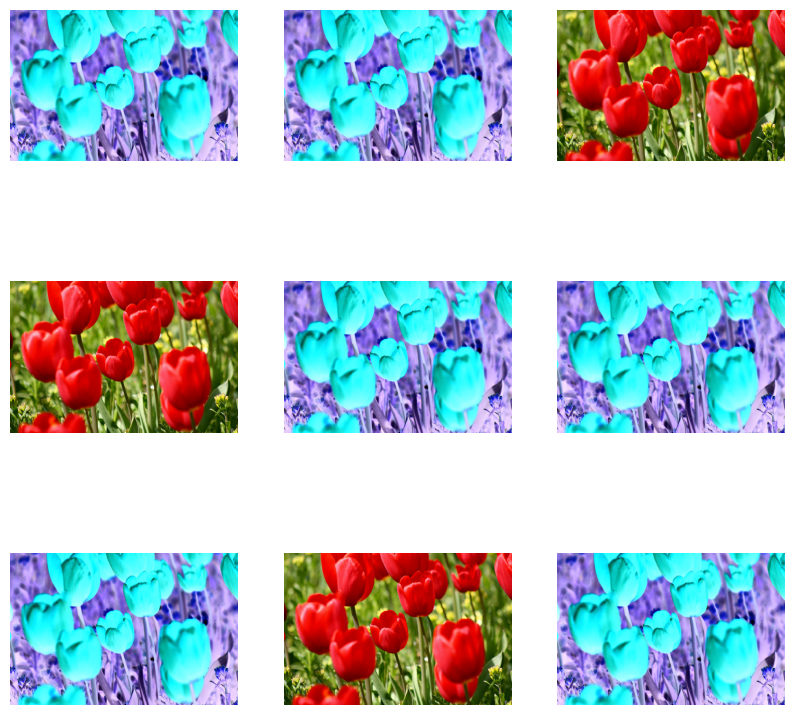
資料擴增
您也可以使用 Keras 預先處理層級進行資料擴增,例如 tf.keras.layers.RandomFlip 和 tf.keras.layers.RandomRotation。
讓我們建立幾個預先處理層級,並將其重複套用至同一張圖片。
data_augmentation = tf.keras.Sequential([
  layers.RandomFlip("horizontal_and_vertical"),
  layers.RandomRotation(0.2),
])
# Add the image to a batch.
image = tf.cast(tf.expand_dims(image, 0), tf.float32)
plt.figure(figsize=(10, 10))
for i in range(9):
  augmented_image = data_augmentation(image)
  ax = plt.subplot(3, 3, i + 1)
  plt.imshow(augmented_image[0])
  plt.axis("off")
WARNING:matplotlib.image:Clipping input data to the valid range for imshow with RGB data ([0..1] for floats or [0..255] for integers).
WARNING:matplotlib.image:Clipping input data to the valid range for imshow with RGB data ([0..1] for floats or [0..255] for integers).
WARNING:matplotlib.image:Clipping input data to the valid range for imshow with RGB data ([0..1] for floats or [0..255] for integers).
WARNING:matplotlib.image:Clipping input data to the valid range for imshow with RGB data ([0..1] for floats or [0..255] for integers).
WARNING:matplotlib.image:Clipping input data to the valid range for imshow with RGB data ([0..1] for floats or [0..255] for integers).
WARNING:matplotlib.image:Clipping input data to the valid range for imshow with RGB data ([0..1] for floats or [0..255] for integers).
WARNING:matplotlib.image:Clipping input data to the valid range for imshow with RGB data ([0..1] for floats or [0..255] for integers).
WARNING:matplotlib.image:Clipping input data to the valid range for imshow with RGB data ([0..1] for floats or [0..255] for integers).
WARNING:matplotlib.image:Clipping input data to the valid range for imshow with RGB data ([0..1] for floats or [0..255] for integers).
您可以將各種預先處理層級用於資料擴增,包括 tf.keras.layers.RandomContrast、tf.keras.layers.RandomCrop、tf.keras.layers.RandomZoom 和其他層級。
使用 Keras 預先處理層級的兩種選項
您可以使用兩種方式使用這些預先處理層級,這兩種方式各有重要的取捨考量。
選項 1:將預先處理層級設為模型的一部分
model = tf.keras.Sequential([
  # Add the preprocessing layers you created earlier.
  resize_and_rescale,
  data_augmentation,
  layers.Conv2D(16, 3, padding='same', activation='relu'),
  layers.MaxPooling2D(),
  # Rest of your model.
])
在此情況下,有兩個重點需要注意
資料擴增將在裝置上與其他層級同步執行,並受益於 GPU 加速。
當您使用
model.save匯出模型時,預先處理層級將與模型的其他部分一起儲存。如果您稍後部署此模型,它會自動標準化圖片 (根據層級的設定)。這可以省去您在伺服器端重新實作該邏輯的精力。
選項 2:將預先處理層級套用至資料集
aug_ds = train_ds.map(
  lambda x, y: (resize_and_rescale(x, training=True), y))
使用這種方法,您可以使用 Dataset.map 建立資料集,產生擴增圖片的批次。在此情況下
- 資料擴增將在 CPU 上非同步發生,且為非封鎖。您可以使用
Dataset.prefetch(如下所示) 將 GPU 上模型的訓練與資料預先處理重疊。 - 在此情況下,當您呼叫
Model.save時,預先處理層級將不會與模型一起匯出。您需要在儲存模型之前將預先處理層級附加到模型,或在伺服器端重新實作這些層級。訓練完成後,您可以在匯出前附加預先處理層級。
您可以在圖片分類教學課程中找到第一個選項的範例。讓我們在此示範第二個選項。
將預先處理層級套用至資料集
使用您先前建立的 Keras 預先處理層級,設定訓練、驗證和測試資料集。您也將設定資料集的效能,方法是使用平行讀取和緩衝預先擷取,從磁碟產生批次,而不會讓 I/O 變成封鎖。(在使用 tf.data API 提升效能指南中瞭解更多資料集效能資訊。)
batch_size = 32
AUTOTUNE = tf.data.AUTOTUNE

def prepare(ds, shuffle=False, augment=False):
  # Resize and rescale all datasets.
  ds = ds.map(lambda x, y: (resize_and_rescale(x), y),
              num_parallel_calls=AUTOTUNE)

  if shuffle:
    ds = ds.shuffle(1000)

  # Batch all datasets.
  ds = ds.batch(batch_size)

  # Use data augmentation only on the training set.
  if augment:
    ds = ds.map(lambda x, y: (data_augmentation(x, training=True), y),
                num_parallel_calls=AUTOTUNE)

  # Use buffered prefetching on all datasets.
  return ds.prefetch(buffer_size=AUTOTUNE)
train_ds = prepare(train_ds, shuffle=True, augment=True)
val_ds = prepare(val_ds)
test_ds = prepare(test_ds)
訓練模型
為了完整起見,您現在將使用您剛準備好的資料集訓練模型。
Sequential 模型由三個卷積區塊 (tf.keras.layers.Conv2D) 組成,每個區塊中都有一個最大池化層 (tf.keras.layers.MaxPooling2D)。模型頂端有一個全連接層 (tf.keras.layers.Dense),其中有 128 個單元,並由 ReLU 啟動函式 ('relu') 啟動。此模型尚未針對準確度進行調整 (目標是向您展示機制)。
model = tf.keras.Sequential([
  layers.Conv2D(16, 3, padding='same', activation='relu'),
  layers.MaxPooling2D(),
  layers.Conv2D(32, 3, padding='same', activation='relu'),
  layers.MaxPooling2D(),
  layers.Conv2D(64, 3, padding='same', activation='relu'),
  layers.MaxPooling2D(),
  layers.Flatten(),
  layers.Dense(128, activation='relu'),
  layers.Dense(num_classes)
])
選擇 tf.keras.optimizers.Adam 最佳化工具和 tf.keras.losses.SparseCategoricalCrossentropy 損失函式。若要檢視每個訓練週期的訓練和驗證準確度,請將 metrics 引數傳遞至 Model.compile。
model.compile(optimizer='adam',
              loss=tf.keras.losses.SparseCategoricalCrossentropy(from_logits=True),
              metrics=['accuracy'])
訓練幾個週期
epochs=5
history = model.fit(
  train_ds,
  validation_data=val_ds,
  epochs=epochs
)
Epoch 1/5
WARNING: All log messages before absl::InitializeLog() is called are written to STDERR
I0000 00:00:1707963675.836253   10200 device_compiler.h:186] Compiled cluster using XLA!  This line is logged at most once for the lifetime of the process.
92/92 [==============================] - 10s 46ms/step - loss: 1.3130 - accuracy: 0.4380 - val_loss: 1.0730 - val_accuracy: 0.6213
Epoch 2/5
92/92 [==============================] - 2s 21ms/step - loss: 1.0332 - accuracy: 0.5988 - val_loss: 1.0585 - val_accuracy: 0.5613
Epoch 3/5
92/92 [==============================] - 2s 21ms/step - loss: 0.9444 - accuracy: 0.6264 - val_loss: 0.9728 - val_accuracy: 0.6104
Epoch 4/5
92/92 [==============================] - 2s 21ms/step - loss: 0.8922 - accuracy: 0.6451 - val_loss: 0.9163 - val_accuracy: 0.6431
Epoch 5/5
92/92 [==============================] - 2s 21ms/step - loss: 0.8407 - accuracy: 0.6638 - val_loss: 0.8458 - val_accuracy: 0.6785
loss, acc = model.evaluate(test_ds)
print("Accuracy", acc)
12/12 [==============================] - 1s 7ms/step - loss: 0.8492 - accuracy: 0.6322
Accuracy 0.6321526169776917
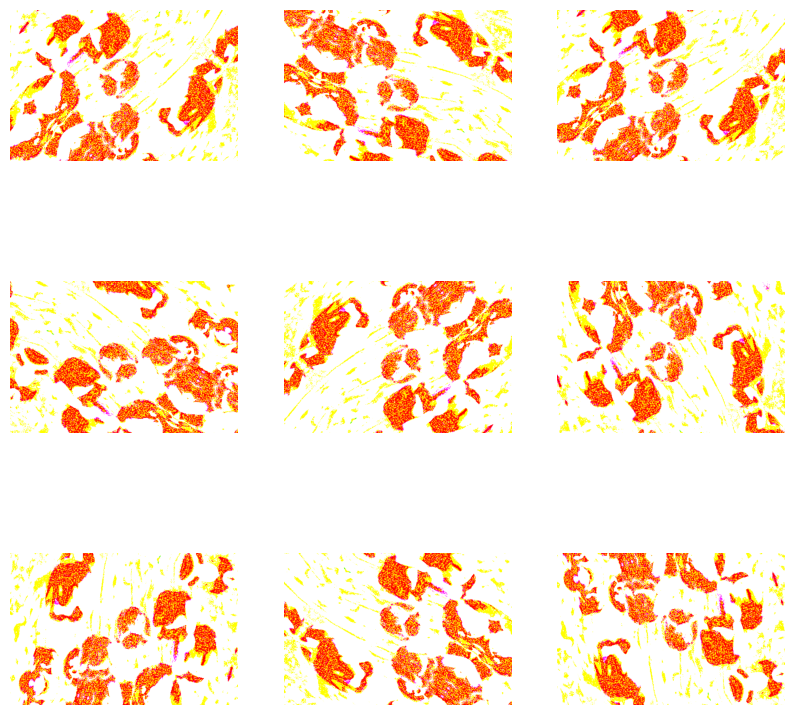
自訂資料擴增
您也可以建立自訂資料擴增層級。
本教學課程的此章節將說明兩種執行方式
- 首先,您將建立
tf.keras.layers.Lambda層級。這是編寫簡潔程式碼的好方法。 - 接下來,您將透過 子類別化 寫入新層級,讓您擁有更多控制權。
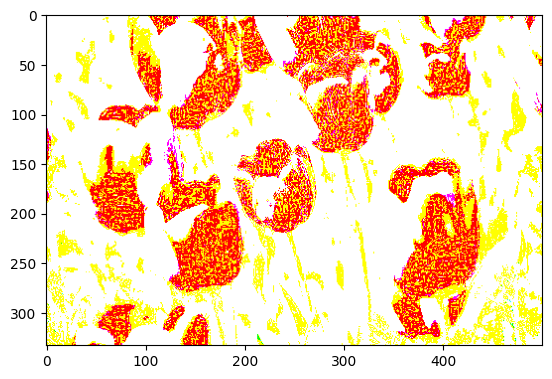
這兩個層級都會根據某些機率隨機反轉圖片中的顏色。
def random_invert_img(x, p=0.5):
  if  tf.random.uniform([]) < p:
    x = (255-x)
  else:
    x
  return x
def random_invert(factor=0.5):
  return layers.Lambda(lambda x: random_invert_img(x, factor))

random_invert = random_invert()
plt.figure(figsize=(10, 10))
for i in range(9):
  augmented_image = random_invert(image)
  ax = plt.subplot(3, 3, i + 1)
  plt.imshow(augmented_image[0].numpy().astype("uint8"))
  plt.axis("off")
接下來,透過 子類別化 實作自訂層級
class RandomInvert(layers.Layer):
  def __init__(self, factor=0.5, **kwargs):
    super().__init__(**kwargs)
    self.factor = factor

  def call(self, x):
    return random_invert_img(x)
_ = plt.imshow(RandomInvert()(image)[0])
WARNING:matplotlib.image:Clipping input data to the valid range for imshow with RGB data ([0..1] for floats or [0..255] for integers).
以上兩個層級都可以如上述選項 1 和 2 中所述使用。
使用 tf.image
上述 Keras 預先處理公用程式非常方便。但是,為了更精細的控制,您可以使用 tf.data 和 tf.image 撰寫自己的資料擴增管道或層級。(您可能也會想查看 TensorFlow Addons Image: Operations 和 TensorFlow I/O: Color Space Conversions。)
由於 flowers 資料集先前已使用資料擴增進行設定,因此讓我們重新匯入它以重新開始
(train_ds, val_ds, test_ds), metadata = tfds.load(
    'tf_flowers',
    split=['train[:80%]', 'train[80%:90%]', 'train[90%:]'],
    with_info=True,
    as_supervised=True,
)
擷取要使用的圖片
image, label = next(iter(train_ds))
_ = plt.imshow(image)
_ = plt.title(get_label_name(label))
2024-02-15 02:21:35.218784: W tensorflow/core/kernels/data/cache_dataset_ops.cc:858] The calling iterator did not fully read the dataset being cached. In order to avoid unexpected truncation of the dataset, the partially cached contents of the dataset will be discarded. This can happen if you have an input pipeline similar to `dataset.cache().take(k).repeat()`. You should use `dataset.take(k).cache().repeat()` instead.

讓我們使用以下函式來並排視覺化和比較原始圖片和擴增圖片
def visualize(original, augmented):
  fig = plt.figure()
  plt.subplot(1,2,1)
  plt.title('Original image')
  plt.imshow(original)

  plt.subplot(1,2,2)
  plt.title('Augmented image')
  plt.imshow(augmented)
資料擴增
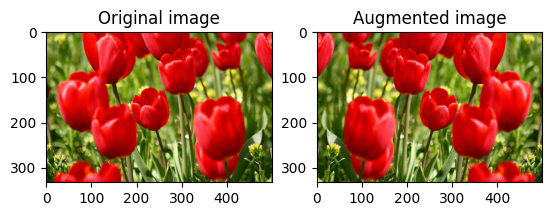
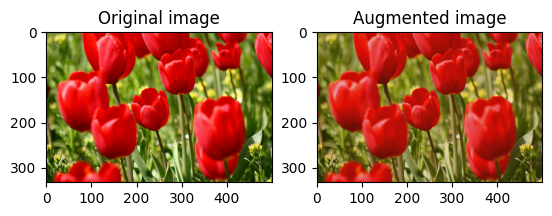
翻轉圖片
使用 tf.image.flip_left_right 垂直或水平翻轉圖片
flipped = tf.image.flip_left_right(image)
visualize(image, flipped)
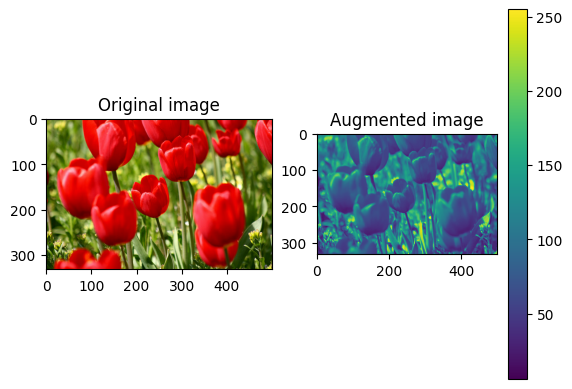
灰階化圖片
您可以使用 tf.image.rgb_to_grayscale 將圖片灰階化
grayscaled = tf.image.rgb_to_grayscale(image)
visualize(image, tf.squeeze(grayscaled))
_ = plt.colorbar()
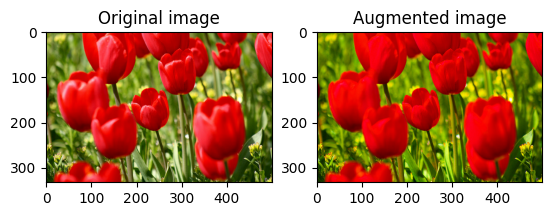
飽和圖片
使用 tf.image.adjust_saturation 並提供飽和度因子來飽和圖片
saturated = tf.image.adjust_saturation(image, 3)
visualize(image, saturated)
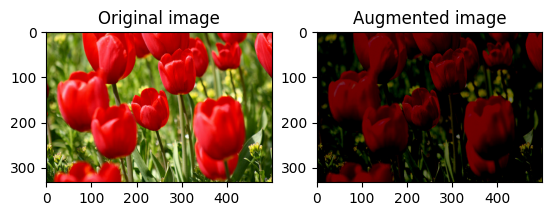
變更圖片亮度
使用 tf.image.adjust_brightness 並提供亮度因子來變更圖片亮度
bright = tf.image.adjust_brightness(image, 0.4)
visualize(image, bright)
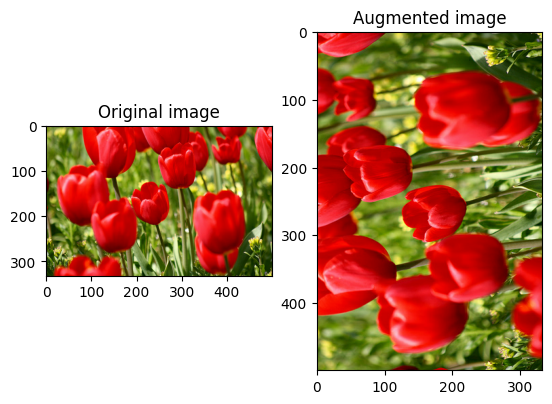
中心裁剪圖片
使用 tf.image.central_crop 從中心裁剪圖片,直到您想要的圖片部分
cropped = tf.image.central_crop(image, central_fraction=0.5)
visualize(image, cropped)
旋轉圖片
使用 tf.image.rot90 將圖片旋轉 90 度
rotated = tf.image.rot90(image)
visualize(image, rotated)
隨機轉換
將隨機轉換套用至圖片可以進一步協助一般化和擴展資料集。目前的 tf.image API 提供八個此類隨機圖片運算 (運算元)
tf.image.stateless_random_brightnesstf.image.stateless_random_contrasttf.image.stateless_random_croptf.image.stateless_random_flip_left_righttf.image.stateless_random_flip_up_downtf.image.stateless_random_huetf.image.stateless_random_jpeg_qualitytf.image.stateless_random_saturation
這些隨機圖片運算元純粹是功能性的:輸出僅取決於輸入。這使得它們易於在高效能、確定性輸入管道中使用。它們需要每個步驟都輸入 seed 值。在給定相同 seed 的情況下,無論呼叫多少次,它們都會傳回相同的結果。
在以下章節中,您將
- 檢閱使用隨機圖片運算來轉換圖片的範例。
- 示範如何將隨機轉換套用至訓練資料集。
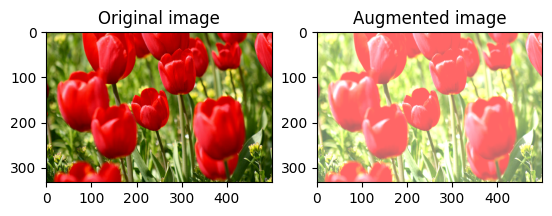
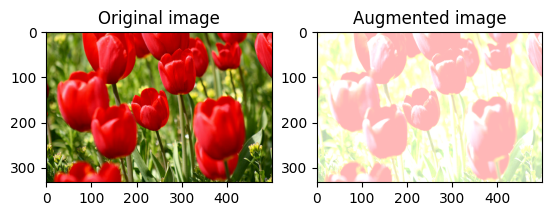
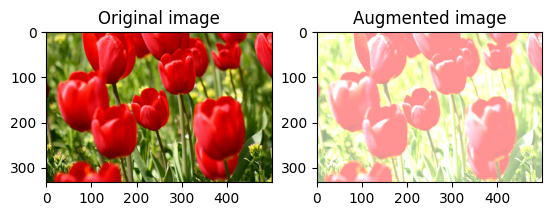
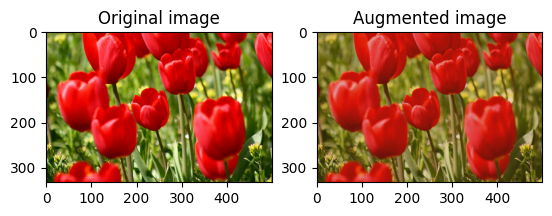
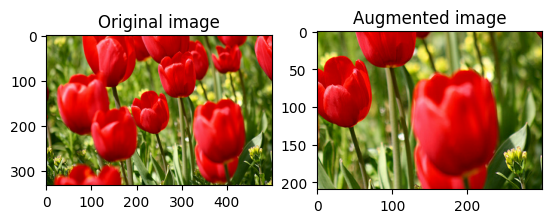
隨機變更圖片亮度
使用 tf.image.stateless_random_brightness 並提供亮度因子和 seed,隨機變更 image 的亮度。亮度因子在 [-max_delta, max_delta) 範圍內隨機選擇,並與給定的 seed 相關聯。
for i in range(3):
  seed = (i, 0)  # tuple of size (2,)
  stateless_random_brightness = tf.image.stateless_random_brightness(
      image, max_delta=0.95, seed=seed)
  visualize(image, stateless_random_brightness)
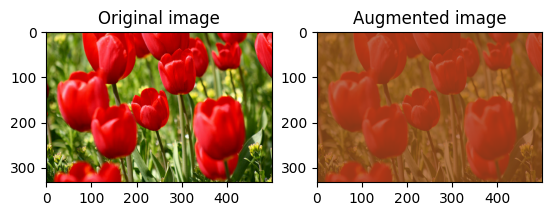
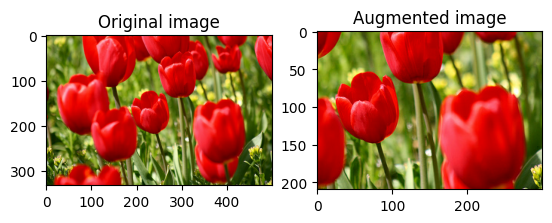
隨機變更圖片對比度
使用 tf.image.stateless_random_contrast 並提供對比度範圍和 seed,隨機變更 image 的對比度。對比度範圍在間隔 [lower, upper] 中隨機選擇,並與給定的 seed 相關聯。
for i in range(3):
  seed = (i, 0)  # tuple of size (2,)
  stateless_random_contrast = tf.image.stateless_random_contrast(
      image, lower=0.1, upper=0.9, seed=seed)
  visualize(image, stateless_random_contrast)
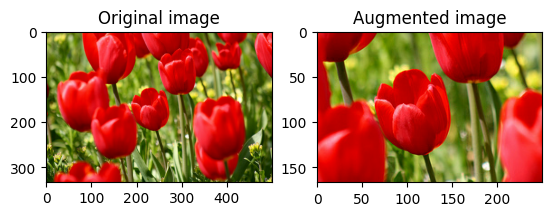
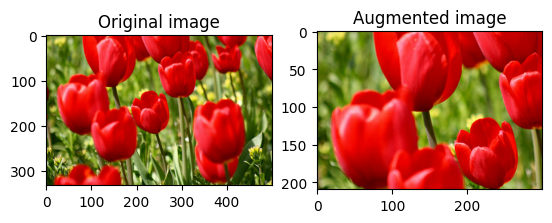
隨機裁剪圖片
使用 tf.image.stateless_random_crop 並提供目標 size 和 seed,隨機裁剪 image。從 image 中裁剪出的部分位於隨機選擇的偏移量,並與給定的 seed 相關聯。
for i in range(3):
  seed = (i, 0)  # tuple of size (2,)
  stateless_random_crop = tf.image.stateless_random_crop(
      image, size=[210, 300, 3], seed=seed)
  visualize(image, stateless_random_crop)
將擴增套用至資料集
讓我們再次下載圖片資料集,以防它們在先前的章節中被修改。
(train_datasets, val_ds, test_ds), metadata = tfds.load(
    'tf_flowers',
    split=['train[:80%]', 'train[80%:90%]', 'train[90%:]'],
    with_info=True,
    as_supervised=True,
)
接下來,定義用於調整大小和重新調整圖片比例的公用程式函式。此函式將用於統一資料集中圖片的大小和比例
def resize_and_rescale(image, label):
  image = tf.cast(image, tf.float32)
  image = tf.image.resize(image, [IMG_SIZE, IMG_SIZE])
  image = (image / 255.0)
  return image, label
讓我們也定義 augment 函式,該函式可以將隨機轉換套用至圖片。此函式將在下一步中用於資料集。
def augment(image_label, seed):
  image, label = image_label
  image, label = resize_and_rescale(image, label)
  image = tf.image.resize_with_crop_or_pad(image, IMG_SIZE + 6, IMG_SIZE + 6)
  # Make a new seed.
  new_seed = tf.random.split(seed, num=1)[0, :]
  # Random crop back to the original size.
  image = tf.image.stateless_random_crop(
      image, size=[IMG_SIZE, IMG_SIZE, 3], seed=seed)
  # Random brightness.
  image = tf.image.stateless_random_brightness(
      image, max_delta=0.5, seed=new_seed)
  image = tf.clip_by_value(image, 0, 1)
  return image, label
選項 1:使用 tf.data.experimental.Counter
建立 tf.data.experimental.Counter 物件 (我們稱之為 counter) 和 Dataset.zip 資料集與 (counter, counter)。這將確保資料集中的每張圖片都與基於 counter 的唯一值 (形狀為 (2,)) 相關聯,稍後可以將其作為 seed 值傳遞到 augment 函式中,以進行隨機轉換。
# Create a `Counter` object and `Dataset.zip` it together with the training set.
counter = tf.data.experimental.Counter()
train_ds = tf.data.Dataset.zip((train_datasets, (counter, counter)))
WARNING:tensorflow:From /tmpfs/tmp/ipykernel_10025/587852618.py:2: CounterV2 (from tensorflow.python.data.experimental.ops.counter) is deprecated and will be removed in a future version.
Instructions for updating:
Use `tf.data.Dataset.counter(...)` instead.
WARNING:tensorflow:From /tmpfs/tmp/ipykernel_10025/587852618.py:2: CounterV2 (from tensorflow.python.data.experimental.ops.counter) is deprecated and will be removed in a future version.
Instructions for updating:
Use `tf.data.Dataset.counter(...)` instead.
將 augment 函式對應至訓練資料集
train_ds = (
    train_ds
    .shuffle(1000)
    .map(augment, num_parallel_calls=AUTOTUNE)
    .batch(batch_size)
    .prefetch(AUTOTUNE)
)
val_ds = (
    val_ds
    .map(resize_and_rescale, num_parallel_calls=AUTOTUNE)
    .batch(batch_size)
    .prefetch(AUTOTUNE)
)
test_ds = (
    test_ds
    .map(resize_and_rescale, num_parallel_calls=AUTOTUNE)
    .batch(batch_size)
    .prefetch(AUTOTUNE)
)
選項 2:使用 tf.random.Generator
- 使用初始
seed值建立tf.random.Generator物件。在同一個產生器物件上呼叫make_seeds函式始終會傳回新的唯一seed值。 - 定義包裝函式,其功能為:1) 呼叫
make_seeds函式;以及 2) 將新產生的seed值傳遞到augment函式中以進行隨機轉換。
# Create a generator.
rng = tf.random.Generator.from_seed(123, alg='philox')
# Create a wrapper function for updating seeds.
def f(x, y):
  seed = rng.make_seeds(1)[:, 0]
  image, label = augment((x, y), seed)
  return image, label
將包裝函式 f 對應至訓練資料集,並將 resize_and_rescale 函式對應至驗證和測試集
train_ds = (
    train_datasets
    .shuffle(1000)
    .map(f, num_parallel_calls=AUTOTUNE)
    .batch(batch_size)
    .prefetch(AUTOTUNE)
)
val_ds = (
    val_ds
    .map(resize_and_rescale, num_parallel_calls=AUTOTUNE)
    .batch(batch_size)
    .prefetch(AUTOTUNE)
)
test_ds = (
    test_ds
    .map(resize_and_rescale, num_parallel_calls=AUTOTUNE)
    .batch(batch_size)
    .prefetch(AUTOTUNE)
)
這些資料集現在可用於訓練模型,如先前所示。
後續步驟
本教學課程示範如何使用 Keras 預先處理層級和 tf.image 進行資料擴增。