
作者: fchollet、lukewood、divamgupta
使用 KerasCV 的 StableDiffusion 模型生成新圖片。
|
|
|
 在 GitHub 上檢視原始碼 在 GitHub 上檢視原始碼
|
 在 keras.io 上檢視 在 keras.io 上檢視
|
總覽
在本指南中,我們將示範如何使用 KerasCV 實作的 stability.ai 文生圖模型 Stable Diffusion,根據文字提示生成全新圖片。
Stable Diffusion 是一個強大的開放原始碼文生圖生成模型。雖然有多種開放原始碼實作方式可讓您輕鬆從文字提示建立圖片,但 KerasCV 的實作方式仍提供一些獨特的優勢。這些優勢包括 XLA 編譯和 混合精度支援,兩者結合可達到最先進的生成速度。
在本指南中,我們將探索 KerasCV 的 Stable Diffusion 實作方式,示範如何使用這些強大的效能提升功能,並探索這些功能提供的效能優勢。
首先,讓我們安裝一些依附元件並整理一些匯入項目
pip install tensorflow keras_cv --upgrade --quiet
━━━━━━━━━━━━━━━━━━━━━━━━━━━━━━━━━━━━━━ 721.6/721.6 kB 13.5 MB/s eta 0:00:00
import time
import keras_cv
from tensorflow import keras
import matplotlib.pyplot as plt
簡介
與大多數教學課程不同,在這些課程中,我們會先說明主題,然後示範如何實作,但對於文生圖生成,實際示範會比口頭說明更容易。
看看 keras_cv.models.StableDiffusion() 的強大功能。
首先,我們建構模型
model = keras_cv.models.StableDiffusion(img_width=512, img_height=512)
By using this model checkpoint, you acknowledge that its usage is subject to the terms of the CreativeML Open RAIL-M license at https://raw.githubusercontent.com/CompVis/stable-diffusion/main/LICENSE
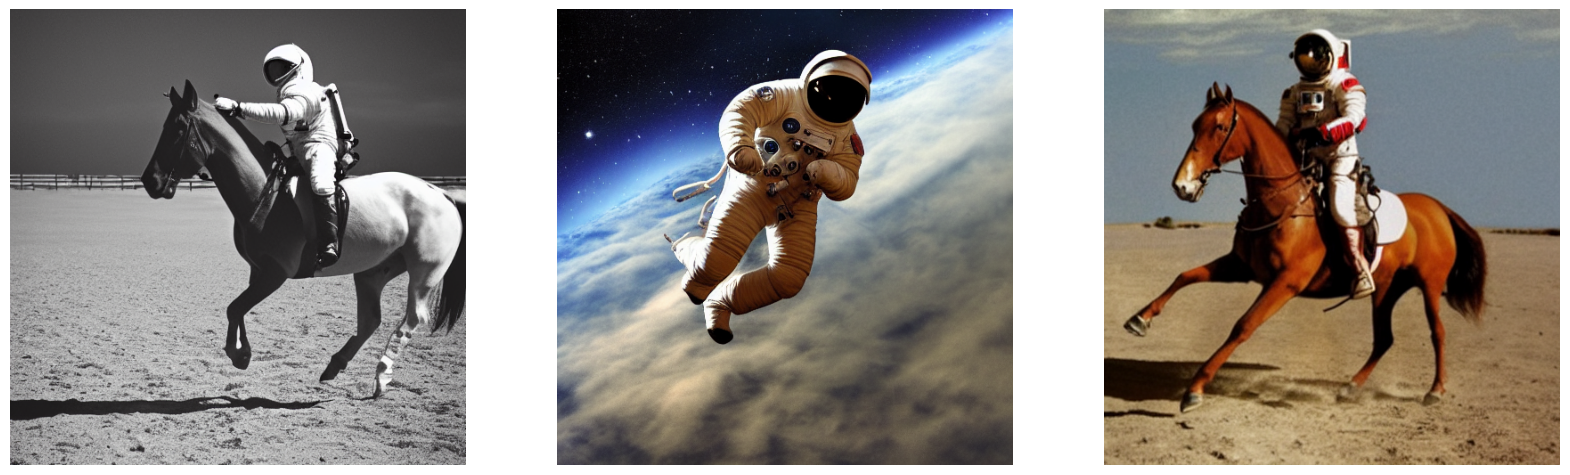
接著,我們提供提示
images = model.text_to_image("photograph of an astronaut riding a horse", batch_size=3)


def plot_images(images):
    plt.figure(figsize=(20, 20))
    for i in range(len(images)):
        ax = plt.subplot(1, len(images), i + 1)
        plt.imshow(images[i])
        plt.axis("off")


plot_images(images)
Downloading data from https://github.com/openai/CLIP/blob/main/clip/bpe_simple_vocab_16e6.txt.gz?raw=true
1356917/1356917 [==============================] - 0s 0us/step
Downloading data from https://huggingface.co/fchollet/stable-diffusion/resolve/main/kcv_encoder.h5
492466864/492466864 [==============================] - 9s 0us/step
Downloading data from https://huggingface.co/fchollet/stable-diffusion/resolve/main/kcv_diffusion_model.h5
3439090152/3439090152 [==============================] - 63s 0us/step
50/50 [==============================] - 126s 295ms/step
Downloading data from https://huggingface.co/fchollet/stable-diffusion/resolve/main/kcv_decoder.h5
198180272/198180272 [==============================] - 2s 0us/step
非常驚人!
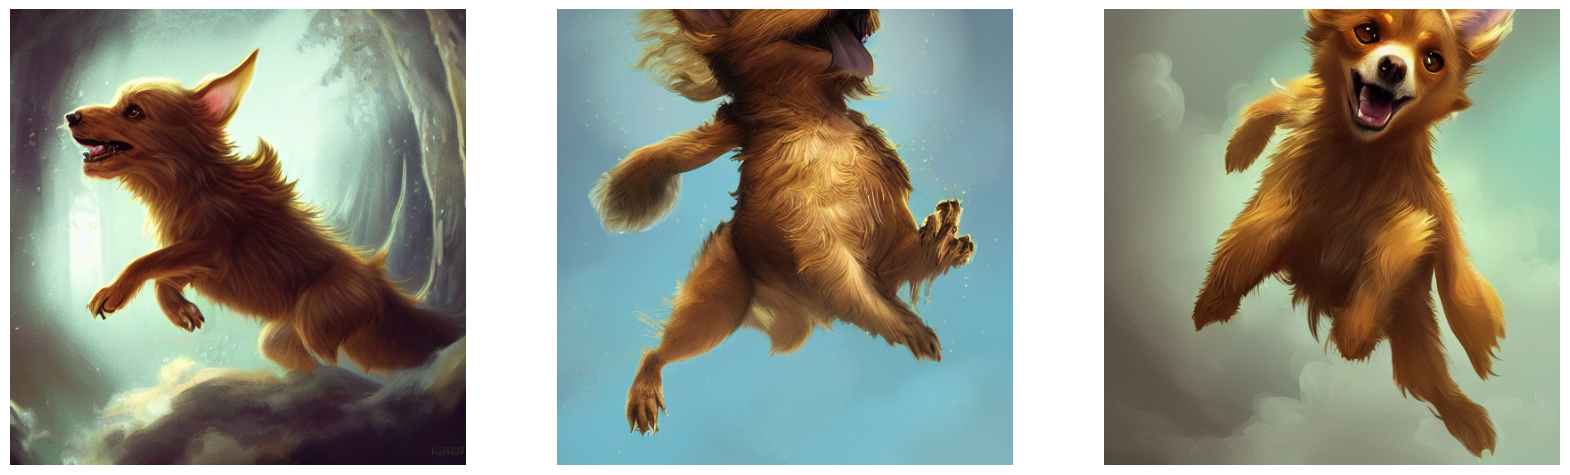
但這不是這個模型的所有功能。讓我們試試更複雜的提示
images = model.text_to_image(
    "cute magical flying dog, fantasy art, "
    "golden color, high quality, highly detailed, elegant, sharp focus, "
    "concept art, character concepts, digital painting, mystery, adventure",
    batch_size=3,
)
plot_images(images)
50/50 [==============================] - 15s 294ms/step

可能性實際上是無窮無盡的 (或至少擴展到 Stable Diffusion 潛在流形的邊界)。
等等,這是怎麼運作的?
與您此時可能預期的不同,StableDiffusion 並非真的靠魔法運作。它是一種「潛在擴散模型」。讓我們深入探討這代表什麼意思。
您可能熟悉超高解析度的概念:可以訓練深度學習模型來消除輸入圖片的雜訊,進而將其轉換為更高解析度的版本。深度學習模型並非透過神奇地復原雜訊、低解析度輸入中遺失的資訊來執行此操作,而是模型使用其訓練資料分佈來虛構最有可能符合輸入的視覺細節。如要進一步瞭解超高解析度,您可以查看下列 Keras.io 教學課程

當您將這個概念推向極限時,您可能會開始問,如果我們只在純雜訊上執行這類模型會怎麼樣?模型接著會「消除雜訊的雜訊」,並開始虛構全新的圖片。透過多次重複這個程序,您可以將一小塊雜訊變成越來越清晰且高解析度的人工圖片。
這是潛在擴散的關鍵概念,在 2020 年的 High-Resolution Image Synthesis with Latent Diffusion Models 中提出。如要深入瞭解擴散,您可以查看 Keras.io 教學課程 Denoising Diffusion Implicit Models。

現在,若要從潛在擴散轉變為文生圖系統,您仍然需要新增一個關鍵功能:透過提示關鍵字控制產生的視覺內容的能力。這透過「條件化」來完成,「條件化」是一種經典的深度學習技術,包含將代表少量文字的向量串連到雜訊區塊,然後根據 {圖片:標題} 配對的資料集訓練模型。
這產生了 Stable Diffusion 架構。Stable Diffusion 包含三個部分
- 文字編碼器,可將您的提示轉換為潛在向量。
- 擴散模型,可重複「消除」64x64 潛在圖片區塊的「雜訊」。
- 解碼器,可將最終的 64x64 潛在區塊轉換為更高解析度的 512x512 圖片。
首先,您的文字提示會由文字編碼器投影到潛在向量空間中,文字編碼器只是一個預先訓練、凍結的語言模型。然後,該提示向量會串連到隨機產生的雜訊區塊,雜訊區塊會透過一系列「步驟」由擴散模型重複「消除雜訊」(您執行的步驟越多,您的圖片就會越清晰、越精美,預設值為 50 個步驟)。
最後,64x64 潛在圖片會透過解碼器傳送,以正確地以高解析度呈現。

總而言之,這是一個非常簡單的系統,Keras 實作方式適用於四個檔案,總共不到 500 行程式碼
- text_encoder.py:87 行程式碼
- diffusion_model.py:181 行程式碼
- decoder.py:86 行程式碼
- stable_diffusion.py:106 行程式碼
但是,一旦您根據數十億張圖片及其標題進行訓練,這個相對簡單的系統就會開始看起來像魔法。正如費曼談到宇宙時所說:「這並不複雜,只是數量龐大!」
KerasCV 的優點
既然有幾種公開可用的 Stable Diffusion 實作方式,為何您應該使用 keras_cv.models.StableDiffusion?
除了易於使用的 API 之外,KerasCV 的 Stable Diffusion 模型還具有一些強大的優勢,包括
- 圖形模式執行
- 透過
jit_compile=True進行 XLA 編譯 - 支援混合精度運算
當這些功能結合在一起時,KerasCV Stable Diffusion 模型的執行速度比單純的實作方式快好幾個數量級。本節說明如何啟用所有這些功能,以及使用這些功能產生的效能提升。
為了進行比較,我們執行基準測試,比較 Stable Diffusion 的 HuggingFace diffusers 實作方式與 KerasCV 實作方式的執行時間。這兩種實作方式的任務都是生成 3 張圖片,每張圖片的步驟計數為 50。在這個基準測試中,我們使用了 Tesla T4 GPU。
我們所有的基準測試都是 GitHub 上的開放原始碼,可以在 Colab 上重新執行以重現結果。 基準測試的結果顯示在下表中
| GPU | 模型 | 執行時間 |
|---|---|---|
| Tesla T4 | KerasCV (暖啟動) | 28.97 秒 |
| Tesla T4 | diffusers (暖啟動) | 41.33 秒 |
| Tesla V100 | KerasCV (暖啟動) | 12.45 |
| Tesla V100 | diffusers (暖啟動) | 12.72 |
在 Tesla T4 上執行時間提升 30%!雖然在 V100 上的提升幅度較小,但我們通常預期基準測試的結果會在所有 NVIDIA GPU 上持續偏好 KerasCV。
為了完整起見,冷啟動和暖啟動生成時間都會回報。冷啟動執行時間包含模型建立和編譯的一次性成本,因此在生產環境中 (您會在生產環境中多次重複使用相同的模型執行個體) 可以忽略不計。無論如何,以下是冷啟動數字
| GPU | 模型 | 執行時間 |
|---|---|---|
| Tesla T4 | KerasCV (冷啟動) | 83.47 秒 |
| Tesla T4 | diffusers (冷啟動) | 46.27 秒 |
| Tesla V100 | KerasCV (冷啟動) | 76.43 |
| Tesla V100 | diffusers (冷啟動) | 13.90 |
雖然執行本指南的執行時間結果可能會有所不同,但在我們的測試中,KerasCV 實作的 Stable Diffusion 比其 PyTorch 對應版本快得多。這可能主要歸因於 XLA 編譯。
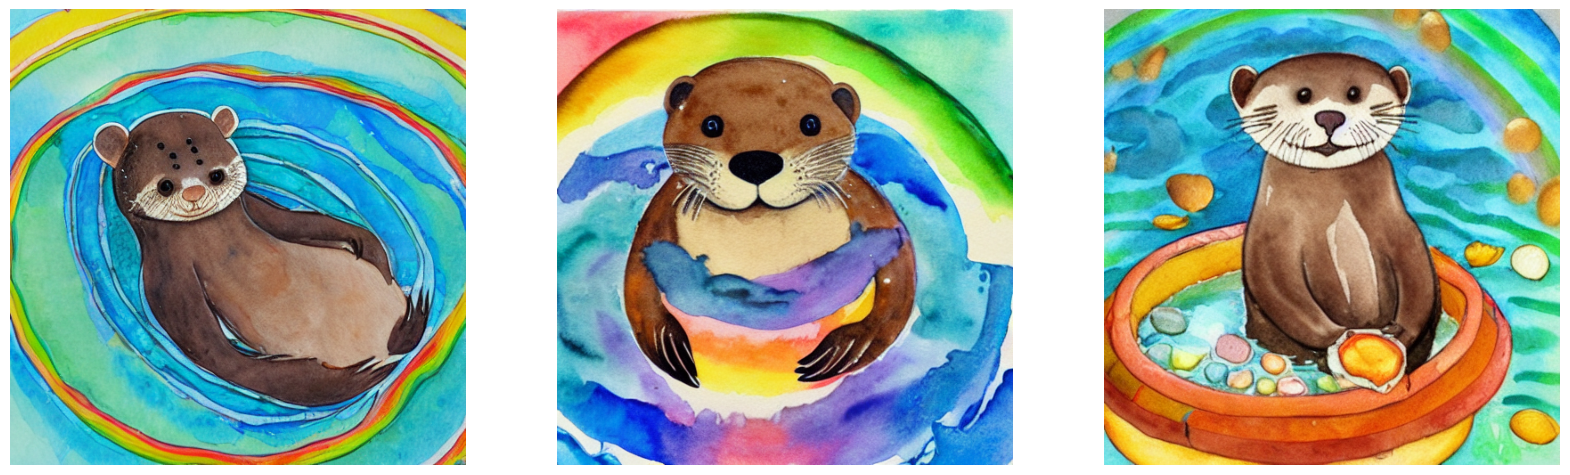
首先,讓我們針對未最佳化的模型執行基準測試
benchmark_result = []
start = time.time()
images = model.text_to_image(
    "A cute otter in a rainbow whirlpool holding shells, watercolor",
    batch_size=3,
)
end = time.time()
benchmark_result.append(["Standard", end - start])
plot_images(images)

print(f"Standard model: {(end - start):.2f} seconds")
keras.backend.clear_session()  # Clear session to preserve memory.
50/50 [==============================] - 15s 294ms/step
Standard model: 15.02 seconds
混合精度
「混合精度」包含使用 float16 精度執行運算,同時以 float32 格式儲存權重。這樣做的目的是利用 float16 運算由比現代 NVIDIA GPU 上 float32 對應版本快得多的核心支援這個事實。
在 Keras (以及因此針對 keras_cv.models.StableDiffusion) 中啟用混合精度運算就像呼叫一樣簡單
keras.mixed_precision.set_global_policy("mixed_float16")
就這樣。開箱即用,它就能運作。
model = keras_cv.models.StableDiffusion()

print("Compute dtype:", model.diffusion_model.compute_dtype)
print(
    "Variable dtype:",
    model.diffusion_model.variable_dtype,
)
By using this model checkpoint, you acknowledge that its usage is subject to the terms of the CreativeML Open RAIL-M license at https://raw.githubusercontent.com/CompVis/stable-diffusion/main/LICENSE
Compute dtype: float16
Variable dtype: float32
如您所見,上面建構的模型現在使用混合精度運算,利用 float16 運算的運算速度,同時以 float32 精度儲存變數。
# Warm up model to run graph tracing before benchmarking.
model.text_to_image("warming up the model", batch_size=3)

start = time.time()
images = model.text_to_image(
    "a cute magical flying dog, fantasy art, "
    "golden color, high quality, highly detailed, elegant, sharp focus, "
    "concept art, character concepts, digital painting, mystery, adventure",
    batch_size=3,
)
end = time.time()
benchmark_result.append(["Mixed Precision", end - start])
plot_images(images)

print(f"Mixed precision model: {(end - start):.2f} seconds")
keras.backend.clear_session()
50/50 [==============================] - 24s 229ms/step
50/50 [==============================] - 11s 229ms/step
Mixed precision model: 11.87 seconds
XLA 編譯
TensorFlow 隨附內建的 XLA:加速線性代數編譯器。keras_cv.models.StableDiffusion 支援開箱即用的 jit_compile 引數。將這個引數設定為 True 會啟用 XLA 編譯,從而大幅提升速度。
讓我們在下面使用這個引數
# Set back to the default for benchmarking purposes.
keras.mixed_precision.set_global_policy("float32")

model = keras_cv.models.StableDiffusion(jit_compile=True)
# Before we benchmark the model, we run inference once to make sure the TensorFlow
# graph has already been traced.
images = model.text_to_image("An avocado armchair", batch_size=3)
plot_images(images)
By using this model checkpoint, you acknowledge that its usage is subject to the terms of the CreativeML Open RAIL-M license at https://raw.githubusercontent.com/CompVis/stable-diffusion/main/LICENSE
50/50 [==============================] - 71s 233ms/step

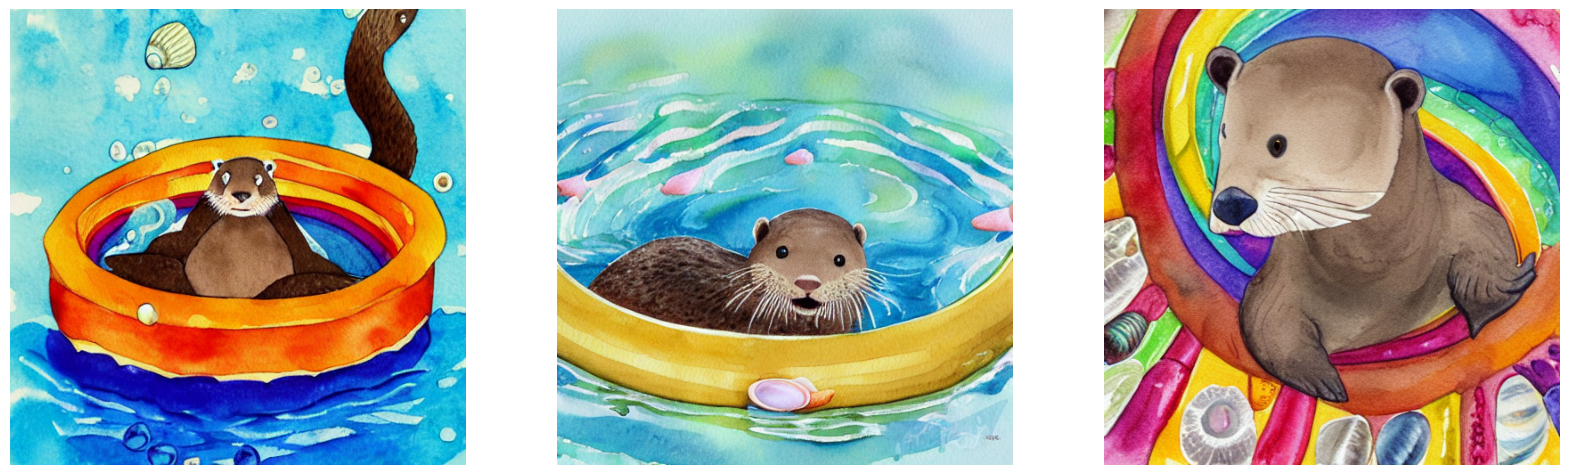
讓我們針對 XLA 模型執行基準測試
start = time.time()
images = model.text_to_image(
    "A cute otter in a rainbow whirlpool holding shells, watercolor",
    batch_size=3,
)
end = time.time()
benchmark_result.append(["XLA", end - start])
plot_images(images)

print(f"With XLA: {(end - start):.2f} seconds")
keras.backend.clear_session()
50/50 [==============================] - 12s 233ms/step
With XLA: 11.84 seconds
在 A100 GPU 上,我們獲得了大約 2 倍的速度提升。太棒了!
整合所有功能
那麼,您要如何組裝世界上效能最高的 Stable Diffusion 推論管線 (截至 2022 年 9 月)?
使用這兩行程式碼
keras.mixed_precision.set_global_policy("mixed_float16")
model = keras_cv.models.StableDiffusion(jit_compile=True)
By using this model checkpoint, you acknowledge that its usage is subject to the terms of the CreativeML Open RAIL-M license at https://raw.githubusercontent.com/CompVis/stable-diffusion/main/LICENSE
以及使用方式…
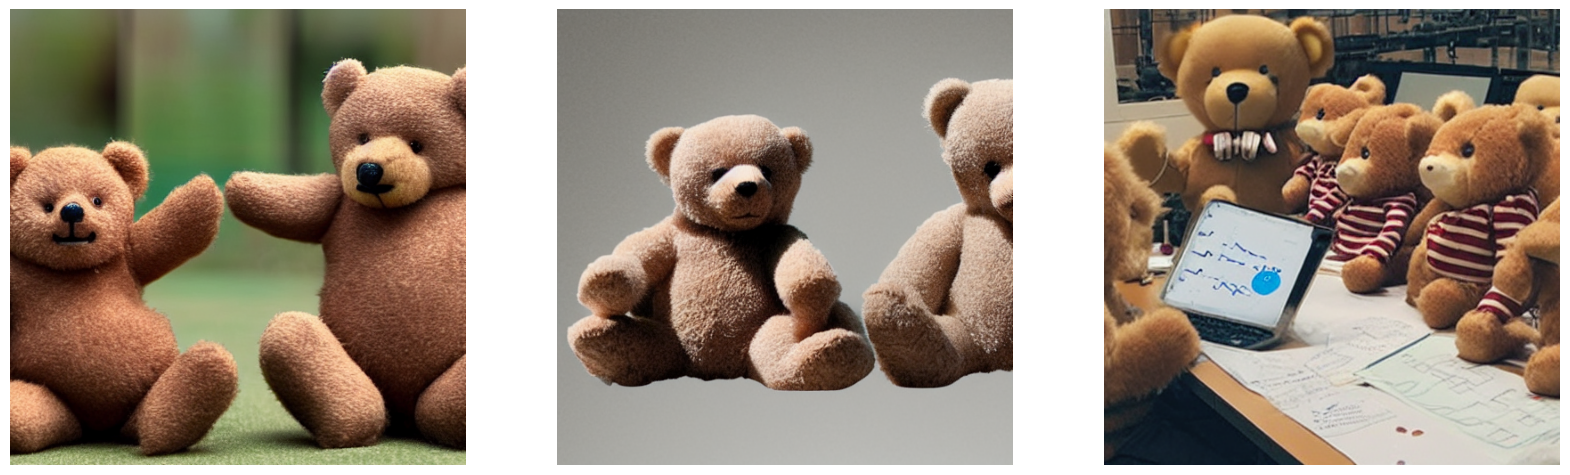
# Let's make sure to warm up the model
images = model.text_to_image(
    "Teddy bears conducting machine learning research",
    batch_size=3,
)
plot_images(images)
50/50 [==============================] - 71s 144ms/step
到底有多快?讓我們來看看!
start = time.time()
images = model.text_to_image(
    "A mysterious dark stranger visits the great pyramids of egypt, "
    "high quality, highly detailed, elegant, sharp focus, "
    "concept art, character concepts, digital painting",
    batch_size=3,
)
end = time.time()
benchmark_result.append(["XLA + Mixed Precision", end - start])
plot_images(images)

print(f"XLA + mixed precision: {(end - start):.2f} seconds")
50/50 [==============================] - 7s 144ms/step
XLA + mixed precision: 7.51 seconds

讓我們查看結果
print("{:<22} {:<22}".format("Model", "Runtime"))
for result in benchmark_result:
    name, runtime = result
    print("{:<22} {:<22}".format(name, runtime))
Model                  Runtime
Standard               15.015103816986084
Mixed Precision        11.867290258407593
XLA                    11.838508129119873
XLA + Mixed Precision  7.507506370544434
我們完全最佳化的模型僅用了四秒鐘,就在 A100 GPU 上從文字提示生成了三張全新圖片。
結論
KerasCV 提供最先進的 Stable Diffusion 實作方式,並且透過使用 XLA 和混合精度,提供截至 2022 年 9 月最快的 Stable Diffusion 管線。
一般來說,在 keras.io 教學課程的結尾,我們會為您提供一些未來的方向,讓您繼續學習。這次,我們為您提供一個想法
執行您自己的提示來執行模型!這絕對是一種樂趣!
如果您有自己的 NVIDIA GPU 或 M1 MacBookPro,您也可以在本機電腦上執行模型。(請注意,在 M1 MacBookPro 上執行時,您不應啟用混合精度,因為 Apple 的 Metal 執行階段尚不支援混合精度。)