
|
|
|
 在 GitHub 上檢視原始碼 在 GitHub 上檢視原始碼
|
|
本教學課程提供如何搭配 TensorFlow 使用 CSV 資料的範例。
主要分為兩個部分:
- 從磁碟載入資料
- 將資料預先處理成適合訓練的形式。
本教學課程著重於載入,並提供一些預先處理的快速範例。若要進一步瞭解預先處理方面,請參閱使用預先處理層指南和使用 Keras 預先處理層分類結構化資料教學課程。
設定
import pandas as pd
import numpy as np

# Make numpy values easier to read.
np.set_printoptions(precision=3, suppress=True)

import tensorflow as tf
from tensorflow.keras import layers
2024-07-13 05:31:36.932819: E external/local_xla/xla/stream_executor/cuda/cuda_fft.cc:479] Unable to register cuFFT factory: Attempting to register factory for plugin cuFFT when one has already been registered
2024-07-13 05:31:36.958817: E external/local_xla/xla/stream_executor/cuda/cuda_dnn.cc:10575] Unable to register cuDNN factory: Attempting to register factory for plugin cuDNN when one has already been registered
2024-07-13 05:31:36.958856: E external/local_xla/xla/stream_executor/cuda/cuda_blas.cc:1442] Unable to register cuBLAS factory: Attempting to register factory for plugin cuBLAS when one has already been registered
記憶體內資料
對於任何小型 CSV 資料集,最簡單的方式是在其上訓練 TensorFlow 模型,就是將其以 pandas DataFrame 或 NumPy 陣列的形式載入記憶體中。
一個相對簡單的範例是鮑魚資料集。
- 這個資料集很小。
- 所有輸入特徵都是有限範圍的浮點值。
以下說明如何將資料下載到 DataFrame
abalone_train = pd.read_csv(
    "https://storage.googleapis.com/download.tensorflow.org/data/abalone_train.csv",
    names=["Length", "Diameter", "Height", "Whole weight", "Shucked weight",
           "Viscera weight", "Shell weight", "Age"])

abalone_train.head()
這個資料集包含一組鮑魚 (一種海蝸牛) 的測量值。

「鮑魚殼」 (作者:Nicki Dugan Pogue,CC BY-SA 2.0)
此資料集的標稱任務是從其他測量值預測年齡,因此請分開特徵和標籤以進行訓練
abalone_features = abalone_train.copy()
abalone_labels = abalone_features.pop('Age')
對於這個資料集,您會將所有特徵視為相同。將特徵封裝到單一 NumPy 陣列中。
abalone_features = np.array(abalone_features)
abalone_features
array([[0.435, 0.335, 0.11 , ..., 0.136, 0.077, 0.097],
       [0.585, 0.45 , 0.125, ..., 0.354, 0.207, 0.225],
       [0.655, 0.51 , 0.16 , ..., 0.396, 0.282, 0.37 ],
       ...,
       [0.53 , 0.42 , 0.13 , ..., 0.374, 0.167, 0.249],
       [0.395, 0.315, 0.105, ..., 0.118, 0.091, 0.119],
       [0.45 , 0.355, 0.12 , ..., 0.115, 0.067, 0.16 ]])
接下來建立一個迴歸模型來預測年齡。由於只有單一輸入張量,因此 tf.keras.Sequential 模型在此已足夠。
abalone_model = tf.keras.Sequential([
  layers.Dense(64, activation='relu'),
  layers.Dense(1)
])

abalone_model.compile(loss = tf.keras.losses.MeanSquaredError(),
                      optimizer = tf.keras.optimizers.Adam())
若要訓練該模型,請將特徵和標籤傳遞至 Model.fit
abalone_model.fit(abalone_features, abalone_labels, epochs=10)
Epoch 1/10
WARNING: All log messages before absl::InitializeLog() is called are written to STDERR
I0000 00:00:1720848701.706380  451497 service.cc:145] XLA service 0x7f9e70006580 initialized for platform CUDA (this does not guarantee that XLA will be used). Devices:
I0000 00:00:1720848701.706434  451497 service.cc:153]   StreamExecutor device (0): Tesla T4, Compute Capability 7.5
I0000 00:00:1720848701.706438  451497 service.cc:153]   StreamExecutor device (1): Tesla T4, Compute Capability 7.5
I0000 00:00:1720848701.706441  451497 service.cc:153]   StreamExecutor device (2): Tesla T4, Compute Capability 7.5
I0000 00:00:1720848701.706444  451497 service.cc:153]   StreamExecutor device (3): Tesla T4, Compute Capability 7.5
94/104 ━━━━━━━━━━━━━━━━━━━━ 0s 1ms/step - loss: 96.5334
I0000 00:00:1720848702.122367  451497 device_compiler.h:188] Compiled cluster using XLA!  This line is logged at most once for the lifetime of the process.
104/104 ━━━━━━━━━━━━━━━━━━━━ 2s 4ms/step - loss: 94.9891
Epoch 2/10
104/104 ━━━━━━━━━━━━━━━━━━━━ 0s 1ms/step - loss: 31.2786
Epoch 3/10
104/104 ━━━━━━━━━━━━━━━━━━━━ 0s 1ms/step - loss: 8.3721
Epoch 4/10
104/104 ━━━━━━━━━━━━━━━━━━━━ 0s 1ms/step - loss: 8.1522
Epoch 5/10
104/104 ━━━━━━━━━━━━━━━━━━━━ 0s 1ms/step - loss: 7.7770
Epoch 6/10
104/104 ━━━━━━━━━━━━━━━━━━━━ 0s 1ms/step - loss: 7.0686
Epoch 7/10
104/104 ━━━━━━━━━━━━━━━━━━━━ 0s 1ms/step - loss: 6.6384
Epoch 8/10
104/104 ━━━━━━━━━━━━━━━━━━━━ 0s 1ms/step - loss: 6.5113
Epoch 9/10
104/104 ━━━━━━━━━━━━━━━━━━━━ 0s 1ms/step - loss: 7.2517
Epoch 10/10
104/104 ━━━━━━━━━━━━━━━━━━━━ 0s 1ms/step - loss: 6.0659
<keras.src.callbacks.history.History at 0x7fa03002be80>
您剛剛看到了使用 CSV 資料訓練模型最基本的方式。接下來,您將學習如何套用預先處理來正規化數值資料行。
基本預先處理
將輸入正規化到模型中是一種良好的實務做法。Keras 預先處理層提供一種便利的方式,可將此正規化建置到模型中。
tf.keras.layers.Normalization 層會預先計算每個資料行的平均值和變異數,並使用這些值來正規化資料。
首先,建立層
normalize = layers.Normalization()
然後,使用 Normalization.adapt 方法來調整正規化層以符合您的資料。
normalize.adapt(abalone_features)
然後,在模型中使用正規化層
norm_abalone_model = tf.keras.Sequential([
  normalize,
  layers.Dense(64, activation='relu'),
  layers.Dense(1)
])

norm_abalone_model.compile(loss = tf.keras.losses.MeanSquaredError(),
                           optimizer = tf.keras.optimizers.Adam())

norm_abalone_model.fit(abalone_features, abalone_labels, epochs=10)
Epoch 1/10
104/104 ━━━━━━━━━━━━━━━━━━━━ 1s 3ms/step - loss: 93.6417
Epoch 2/10
104/104 ━━━━━━━━━━━━━━━━━━━━ 0s 1ms/step - loss: 48.7377
Epoch 3/10
104/104 ━━━━━━━━━━━━━━━━━━━━ 0s 1ms/step - loss: 26.9893
Epoch 4/10
104/104 ━━━━━━━━━━━━━━━━━━━━ 0s 1ms/step - loss: 18.4746
Epoch 5/10
104/104 ━━━━━━━━━━━━━━━━━━━━ 0s 1ms/step - loss: 11.3473
Epoch 6/10
104/104 ━━━━━━━━━━━━━━━━━━━━ 0s 1ms/step - loss: 7.5720
Epoch 7/10
104/104 ━━━━━━━━━━━━━━━━━━━━ 0s 1ms/step - loss: 6.3920
Epoch 8/10
104/104 ━━━━━━━━━━━━━━━━━━━━ 0s 1ms/step - loss: 6.4452
Epoch 9/10
104/104 ━━━━━━━━━━━━━━━━━━━━ 0s 1ms/step - loss: 5.8708
Epoch 10/10
104/104 ━━━━━━━━━━━━━━━━━━━━ 0s 1ms/step - loss: 5.8409
<keras.src.callbacks.history.History at 0x7fa0280efee0>
混合資料類型
在前幾個章節中,您使用的是所有特徵都是有限範圍浮點值的資料集。但並非所有資料集都僅限於單一資料類型。
「鐵達尼號」資料集包含鐵達尼號乘客的相關資訊。此資料集的標稱任務是預測誰存活下來。
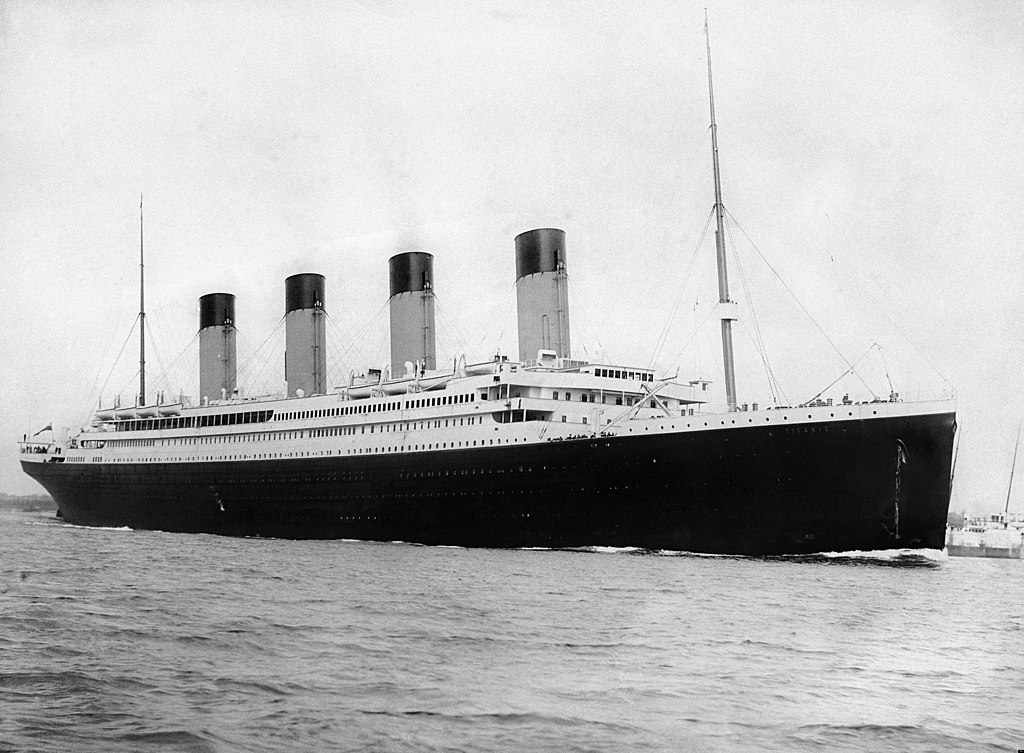
圖片來源:維基媒體
原始資料可以輕鬆載入為 Pandas DataFrame,但無法立即用作 TensorFlow 模型的輸入。
titanic = pd.read_csv("https://storage.googleapis.com/tf-datasets/titanic/train.csv")
titanic.head()
titanic_features = titanic.copy()
titanic_labels = titanic_features.pop('survived')
由於資料類型和範圍不同,您無法只是將特徵堆疊到 NumPy 陣列中,並將其傳遞至 tf.keras.Sequential 模型。每個資料行都需要個別處理。
作為一個選項,您可以離線預先處理資料 (使用您喜歡的任何工具),將類別資料行轉換為數值資料行,然後將處理過的輸出傳遞至 TensorFlow 模型。這種方法的缺點是,如果您儲存並匯出模型,預先處理不會隨之儲存。Keras 預先處理層可避免這個問題,因為它們是模型的一部分。
在本範例中,您將建構一個使用 Keras 函數式 API 實作預先處理邏輯的模型。您也可以透過子類別化來完成。
函數式 API 在「符號」張量上運作。一般的「立即」張量具有值。相較之下,這些「符號」張量則沒有。相反地,它們會追蹤在其上執行的運算,並建立計算的表示法,供您稍後執行。以下是一個快速範例:
# Create a symbolic input
input = tf.keras.Input(shape=(), dtype=tf.float32)

# Perform a calculation using the input
result = 2*input + 1

# the result doesn't have a value
result
<KerasTensor shape=(None,), dtype=float32, sparse=False, name=keras_tensor_9>
calc = tf.keras.Model(inputs=input, outputs=result)
print(calc(np.array([1])).numpy())
print(calc(np.array([2])).numpy())
[3.]
[5.]
若要建構預先處理模型,請先建構一組符號 tf.keras.Input 物件,以符合 CSV 資料行的名稱和資料類型。
inputs = {}

for name, column in titanic_features.items():
  dtype = column.dtype
  if dtype == object:
    dtype = tf.string
  else:
    dtype = tf.float32

  inputs[name] = tf.keras.Input(shape=(1,), name=name, dtype=dtype)

inputs
{'sex': <KerasTensor shape=(None, 1), dtype=string, sparse=None, name=sex>,
 'age': <KerasTensor shape=(None, 1), dtype=float32, sparse=None, name=age>,
 'n_siblings_spouses': <KerasTensor shape=(None, 1), dtype=float32, sparse=None, name=n_siblings_spouses>,
 'parch': <KerasTensor shape=(None, 1), dtype=float32, sparse=None, name=parch>,
 'fare': <KerasTensor shape=(None, 1), dtype=float32, sparse=None, name=fare>,
 'class': <KerasTensor shape=(None, 1), dtype=string, sparse=None, name=class>,
 'deck': <KerasTensor shape=(None, 1), dtype=string, sparse=None, name=deck>,
 'embark_town': <KerasTensor shape=(None, 1), dtype=string, sparse=None, name=embark_town>,
 'alone': <KerasTensor shape=(None, 1), dtype=string, sparse=None, name=alone>}
預先處理邏輯的第一步是將數值輸入串連在一起,並透過正規化層執行
numeric_inputs = {name:input for name,input in inputs.items()
                  if input.dtype==tf.float32}

x = layers.Concatenate()(list(numeric_inputs.values()))
norm = layers.Normalization()
norm.adapt(np.array(titanic[numeric_inputs.keys()]))
all_numeric_inputs = norm(x)

all_numeric_inputs
<KerasTensor shape=(None, 4), dtype=float32, sparse=False, name=keras_tensor_11>
收集所有符號預先處理結果,以便稍後串連它們
preprocessed_inputs = [all_numeric_inputs]
對於字串輸入,請使用 tf.keras.layers.StringLookup 函數,將字串對應至詞彙表中的整數索引。接下來,使用 tf.keras.layers.CategoryEncoding 將索引轉換為適合模型的 float32 資料。
tf.keras.layers.CategoryEncoding 層的預設設定會為每個輸入建立一個獨熱向量。tf.keras.layers.Embedding 也適用。如需更多關於此主題的資訊,請參閱使用預先處理層指南和使用 Keras 預先處理層分類結構化資料教學課程。
for name, input in inputs.items():
  if input.dtype == tf.float32:
    continue

  lookup = layers.StringLookup(vocabulary=np.unique(titanic_features[name]))
  one_hot = layers.CategoryEncoding(num_tokens=lookup.vocabulary_size())

  x = lookup(input)
  x = one_hot(x)
  preprocessed_inputs.append(x)
有了 inputs 和 preprocessed_inputs 的集合,您可以將所有預先處理的輸入串連在一起,並建構一個處理預先處理的模型
preprocessed_inputs_cat = layers.Concatenate()(preprocessed_inputs)

titanic_preprocessing = tf.keras.Model(inputs, preprocessed_inputs_cat)

tf.keras.utils.plot_model(model = titanic_preprocessing , rankdir="LR", dpi=72, show_shapes=True)
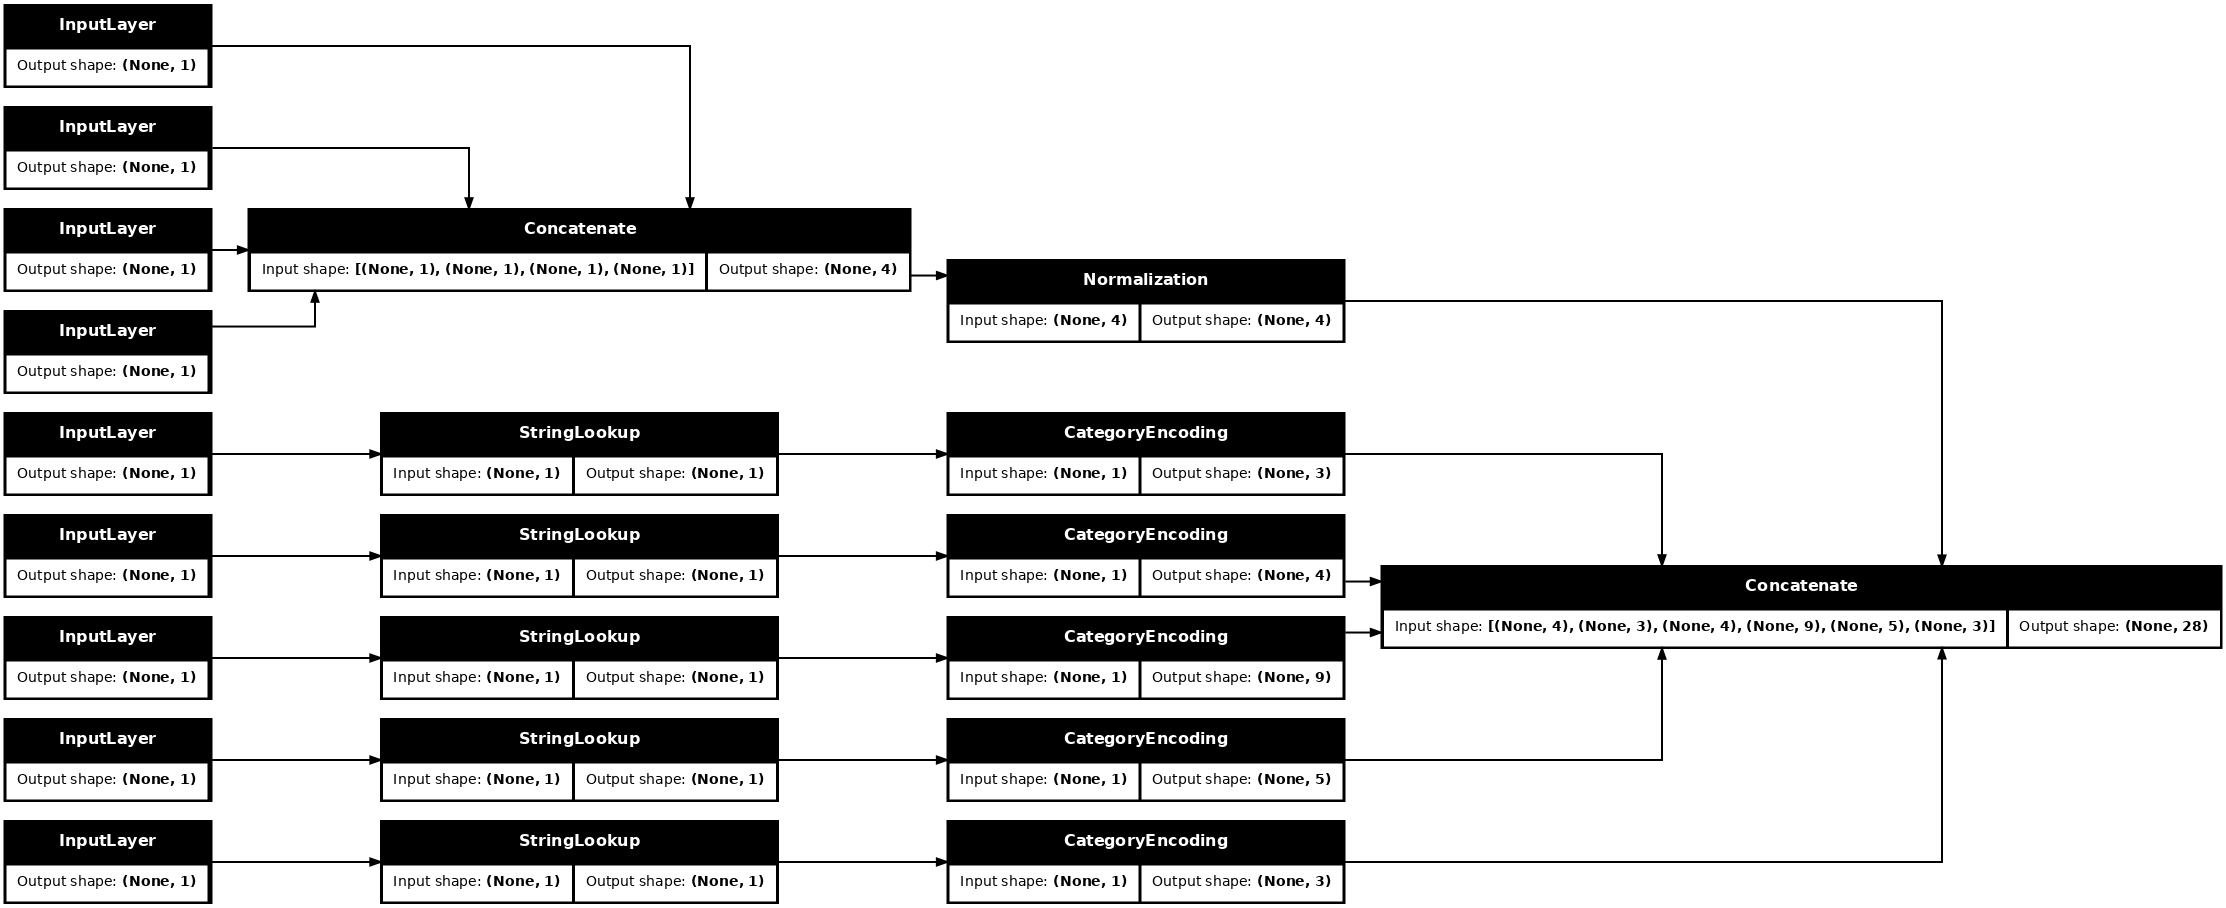
這個模型僅包含輸入預先處理。您可以執行它來查看它對資料的作用。Keras 模型不會自動轉換 pandas DataFrame,因為不清楚它應該轉換為單一張量還是張量字典。因此,請將其轉換為張量字典
titanic_features_dict = {name: np.array(value)
                         for name, value in titanic_features.items()}
切出第一個訓練範例並將其傳遞至此預先處理模型,您會看到數值特徵和字串獨熱向量全部串連在一起
features_dict = {name:values[:1] for name, values in titanic_features_dict.items()}
titanic_preprocessing(features_dict)
<tf.Tensor: shape=(1, 28), dtype=float32, numpy=
array([[-0.61 ,  0.395, -0.479, -0.497,  0.   ,  0.   ,  1.   ,  0.   ,

         0.   ,  0.   ,  1.   ,  0.   ,  0.   ,  0.   ,  0.   ,  0.   ,
         0.   ,  0.   ,  0.   ,  1.   ,  0.   ,  0.   ,  0.   ,  1.   ,
         0.   ,  0.   ,  1.   ,  0.   ]], dtype=float32)>
現在,在此基礎上建構模型
def titanic_model(preprocessing_head, inputs):
  body = tf.keras.Sequential([
    layers.Dense(64, activation='relu'),
    layers.Dense(1)
  ])

  preprocessed_inputs = preprocessing_head(inputs)
  result = body(preprocessed_inputs)
  model = tf.keras.Model(inputs, result)

  model.compile(loss=tf.keras.losses.BinaryCrossentropy(from_logits=True),
                optimizer=tf.keras.optimizers.Adam())
  return model

titanic_model = titanic_model(titanic_preprocessing, inputs)
當您訓練模型時,請將特徵字典作為 x 傳遞,並將標籤作為 y 傳遞。
titanic_model.fit(x=titanic_features_dict, y=titanic_labels, epochs=10)
Epoch 1/10
20/20 ━━━━━━━━━━━━━━━━━━━━ 2s 3ms/step - loss: 0.6619
Epoch 2/10
20/20 ━━━━━━━━━━━━━━━━━━━━ 0s 3ms/step - loss: 0.5967
Epoch 3/10
20/20 ━━━━━━━━━━━━━━━━━━━━ 0s 3ms/step - loss: 0.5366
Epoch 4/10
20/20 ━━━━━━━━━━━━━━━━━━━━ 0s 3ms/step - loss: 0.4809
Epoch 5/10
20/20 ━━━━━━━━━━━━━━━━━━━━ 0s 3ms/step - loss: 0.5004
Epoch 6/10
20/20 ━━━━━━━━━━━━━━━━━━━━ 0s 3ms/step - loss: 0.4659
Epoch 7/10
20/20 ━━━━━━━━━━━━━━━━━━━━ 0s 3ms/step - loss: 0.4474
Epoch 8/10
20/20 ━━━━━━━━━━━━━━━━━━━━ 0s 3ms/step - loss: 0.4304
Epoch 9/10
20/20 ━━━━━━━━━━━━━━━━━━━━ 0s 3ms/step - loss: 0.3952
Epoch 10/10
20/20 ━━━━━━━━━━━━━━━━━━━━ 0s 3ms/step - loss: 0.4256
<keras.src.callbacks.history.History at 0x7fa153fe5280>
由於預先處理是模型的一部分,因此您可以儲存模型並在其他地方重新載入,並獲得相同的結果
titanic_model.save('test.keras')
reloaded = tf.keras.models.load_model('test.keras')
features_dict = {name:values[:1] for name, values in titanic_features_dict.items()}

before = titanic_model(features_dict)
after = reloaded(features_dict)
assert (before-after)<1e-3
print(before)
print(after)
tf.Tensor([[-1.932]], shape=(1, 1), dtype=float32)
tf.Tensor([[-1.932]], shape=(1, 1), dtype=float32)
使用 tf.data
在前一節中,您在訓練模型時依賴模型的內建資料隨機排序和批次處理。
如果您需要更精細地控制輸入資料管道,或需要使用不容易放入記憶體的資料:請使用 tf.data。
如需更多範例,請參閱 tf.data:建構 TensorFlow 輸入管道指南。
關於記憶體內資料
作為將 tf.data 套用至 CSV 資料的第一個範例,請考慮以下程式碼,以手動方式從前一節的特徵字典中切出片段。對於每個索引,它會為每個特徵採用該索引
import itertools

def slices(features):
  for i in itertools.count():
    # For each feature take index `i`
    example = {name:values[i] for name, values in features.items()}
    yield example
執行此程式碼並列印第一個範例
for example in slices(titanic_features_dict):
  for name, value in example.items():
    print(f"{name:19s}: {value}")
  break
sex                : male
age                : 22.0
n_siblings_spouses : 1
parch              : 0
fare               : 7.25
class              : Third
deck               : unknown
embark_town        : Southampton
alone              : n
最基本的 tf.data.Dataset 記憶體內資料載入器是 Dataset.from_tensor_slices 建構函式。這會傳回 tf.data.Dataset,其會實作上述 slices 函數的廣義版本 (在 TensorFlow 中)。
features_ds = tf.data.Dataset.from_tensor_slices(titanic_features_dict)
您可以像任何其他 Python 可迭代物件一樣,反覆運算 tf.data.Dataset
for example in features_ds:
  for name, value in example.items():
    print(f"{name:19s}: {value}")
  break
sex                : b'male'
age                : 22.0
n_siblings_spouses : 1
parch              : 0
fare               : 7.25
class              : b'Third'
deck               : b'unknown'
embark_town        : b'Southampton'
alone              : b'n'
from_tensor_slices 函數可以處理任何巢狀字典或元組的結構。以下程式碼建立 (features_dict, labels) 配對的資料集
titanic_ds = tf.data.Dataset.from_tensor_slices((titanic_features_dict, titanic_labels))
若要使用此 Dataset 訓練模型,您至少需要 shuffle 和 batch 資料。
titanic_batches = titanic_ds.shuffle(len(titanic_labels)).batch(32)
您不是將 features 和 labels 傳遞至 Model.fit,而是傳遞資料集
titanic_model.fit(titanic_batches, epochs=5)
Epoch 1/5
20/20 ━━━━━━━━━━━━━━━━━━━━ 0s 3ms/step - loss: 0.4309
Epoch 2/5
20/20 ━━━━━━━━━━━━━━━━━━━━ 0s 3ms/step - loss: 0.4024
Epoch 3/5
20/20 ━━━━━━━━━━━━━━━━━━━━ 0s 3ms/step - loss: 0.4184
Epoch 4/5
20/20 ━━━━━━━━━━━━━━━━━━━━ 0s 3ms/step - loss: 0.3813
Epoch 5/5
20/20 ━━━━━━━━━━━━━━━━━━━━ 0s 3ms/step - loss: 0.3939
<keras.src.callbacks.history.History at 0x7fa153fe73d0>
從單一檔案
到目前為止,本教學課程都使用記憶體內資料。tf.data 是一個高度可擴充的工具組,可用於建構資料管道,並提供一些載入 CSV 檔案的函數。
titanic_file_path = tf.keras.utils.get_file("train.csv", "https://storage.googleapis.com/tf-datasets/titanic/train.csv")
Downloading data from https://storage.googleapis.com/tf-datasets/titanic/train.csv
30874/30874 ━━━━━━━━━━━━━━━━━━━━ 0s 0us/step
現在從檔案讀取 CSV 資料,並建立 tf.data.Dataset。
(如需完整文件,請參閱 tf.data.experimental.make_csv_dataset)
titanic_csv_ds = tf.data.experimental.make_csv_dataset(
    titanic_file_path,
    batch_size=5, # Artificially small to make examples easier to show.
    label_name='survived',
    num_epochs=1,
    ignore_errors=True,)
WARNING:tensorflow:From /tmpfs/src/tf_docs_env/lib/python3.9/site-packages/tensorflow/python/data/experimental/ops/readers.py:572: ignore_errors (from tensorflow.python.data.experimental.ops.error_ops) is deprecated and will be removed in a future version.
Instructions for updating:
Use `tf.data.Dataset.ignore_errors` instead.
此函數包含許多便利功能,因此資料很容易使用。包括:
- 使用資料行標題作為字典鍵。
- 自動判斷每個資料行的類型。
for batch, label in titanic_csv_ds.take(1):
  for key, value in batch.items():
    print(f"{key:20s}: {value}")
  print()
  print(f"{'label':20s}: {label}")
sex                 : [b'female' b'male' b'male' b'male' b'male']
age                 : [ 2. 28. 18. 32. 28.]
n_siblings_spouses  : [0 0 1 0 0]
parch               : [1 0 0 0 0]
fare                : [ 12.288   7.896 108.9    30.5    13.   ]
class               : [b'Third' b'Third' b'First' b'First' b'Second']
deck                : [b'unknown' b'unknown' b'C' b'B' b'unknown']
embark_town         : [b'Southampton' b'Southampton' b'Cherbourg' b'Cherbourg' b'Southampton']
alone               : [b'n' b'y' b'n' b'y' b'y']

label               : [1 0 0 1 1]
2024-07-13 05:31:51.519261: W tensorflow/core/framework/local_rendezvous.cc:404] Local rendezvous is aborting with status: OUT_OF_RANGE: End of sequence
它也可以即時解壓縮資料。以下是包含都會區州際公路交通量資料集的 gzipped CSV 檔案。
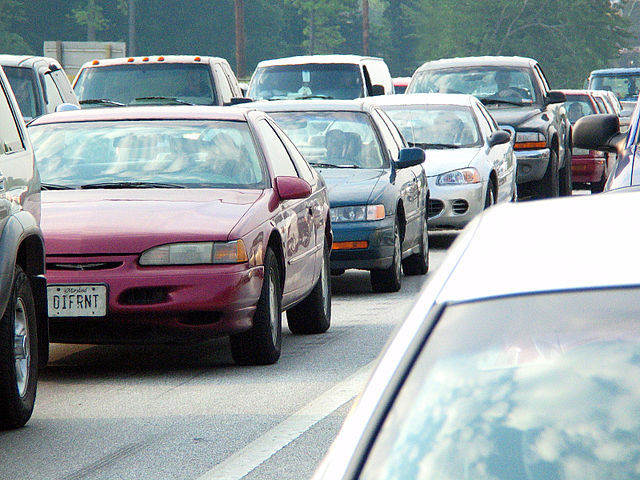
圖片來源:維基媒體
traffic_volume_csv_gz = tf.keras.utils.get_file(
    'Metro_Interstate_Traffic_Volume.csv.gz',
    "https://archive.ics.uci.edu/ml/machine-learning-databases/00492/Metro_Interstate_Traffic_Volume.csv.gz",
    cache_dir='.', cache_subdir='traffic')
Downloading data from https://archive.ics.uci.edu/ml/machine-learning-databases/00492/Metro_Interstate_Traffic_Volume.csv.gz
 335872/Unknown 0s 1us/step
設定 compression_type 引數以直接從壓縮檔案讀取
traffic_volume_csv_gz_ds = tf.data.experimental.make_csv_dataset(
    traffic_volume_csv_gz,
    batch_size=256,
    label_name='traffic_volume',
    num_epochs=1,
    compression_type="GZIP")

for batch, label in traffic_volume_csv_gz_ds.take(1):
  for key, value in batch.items():
    print(f"{key:20s}: {value[:5]}")
  print()
  print(f"{'label':20s}: {label[:5]}")
holiday             : [b'None' b'None' b'None' b'None' b'None']
temp                : [288.99 294.07 262.2  284.58 295.89]
rain_1h             : [0. 0. 0. 0. 0.]
snow_1h             : [0. 0. 0. 0. 0.]
clouds_all          : [ 0 56 90 90  1]
weather_main        : [b'Clear' b'Clouds' b'Clouds' b'Rain' b'Clear']
weather_description : [b'Sky is Clear' b'broken clouds' b'overcast clouds' b'light rain'
 b'sky is clear']
date_time           : [b'2013-08-08 07:00:00' b'2013-07-15 04:00:00' b'2013-02-21 19:00:00'
 b'2013-05-10 13:00:00' b'2013-04-28 16:00:00']

label               : [6771  828 3431 5457 4475]
2024-07-13 05:31:52.189408: W tensorflow/core/framework/local_rendezvous.cc:404] Local rendezvous is aborting with status: OUT_OF_RANGE: End of sequence
快取
剖析 CSV 資料會產生一些額外負荷。對於小型模型來說,這可能是訓練的瓶頸。
根據您的使用情況,使用 Dataset.cache 或 tf.data.Dataset.snapshot 可能是一個好主意,這樣 CSV 資料只會在第一個週期剖析。
cache 和 snapshot 方法之間的主要差異在於,cache 檔案只能由建立它們的 TensorFlow 程序使用,但 snapshot 檔案可以由其他程序讀取。
例如,反覆運算 traffic_volume_csv_gz_ds 20 次可能需要約 15 秒 (不使用快取),或約 2 秒 (使用快取)。
%%time
for i, (batch, label) in enumerate(traffic_volume_csv_gz_ds.repeat(20)):
  if i % 40 == 0:
    print('.', end='')
print()
...............................................................................................
CPU times: user 13.3 s, sys: 2.27 s, total: 15.6 s
Wall time: 9.8 s
2024-07-13 05:32:01.991227: W tensorflow/core/framework/local_rendezvous.cc:404] Local rendezvous is aborting with status: OUT_OF_RANGE: End of sequence
%%time
caching = traffic_volume_csv_gz_ds.cache().shuffle(1000)

for i, (batch, label) in enumerate(caching.shuffle(1000).repeat(20)):
  if i % 40 == 0:
    print('.', end='')
print()
...............................................................................................
CPU times: user 1.85 s, sys: 200 ms, total: 2.05 s
Wall time: 1.75 s
2024-07-13 05:32:03.764820: W tensorflow/core/framework/local_rendezvous.cc:404] Local rendezvous is aborting with status: OUT_OF_RANGE: End of sequence
%%time
snapshotting = traffic_volume_csv_gz_ds.snapshot('titanic.tfsnap').shuffle(1000)

for i, (batch, label) in enumerate(snapshotting.shuffle(1000).repeat(20)):
  if i % 40 == 0:
    print('.', end='')
print()
...............................................................................................
CPU times: user 2.75 s, sys: 583 ms, total: 3.33 s
Wall time: 2.05 s
2024-07-13 05:32:05.819285: W tensorflow/core/framework/local_rendezvous.cc:404] Local rendezvous is aborting with status: OUT_OF_RANGE: End of sequence
如果您的資料載入因載入 CSV 檔案而變慢,且 Dataset.cache 和 tf.data.Dataset.snapshot 不足以滿足您的使用情況,請考慮將資料重新編碼為更精簡的格式。
多個檔案
到目前為止,本節中的所有範例都可以輕鬆地在沒有 tf.data 的情況下完成。tf.data 真正可以簡化事情的一個地方是處理檔案集合時。
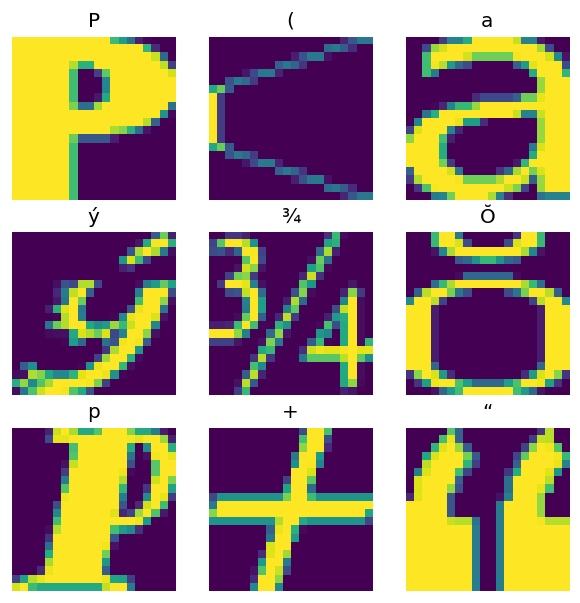
例如,字元字型圖片資料集以 CSV 檔案集合的形式散佈,每個字型一個檔案。
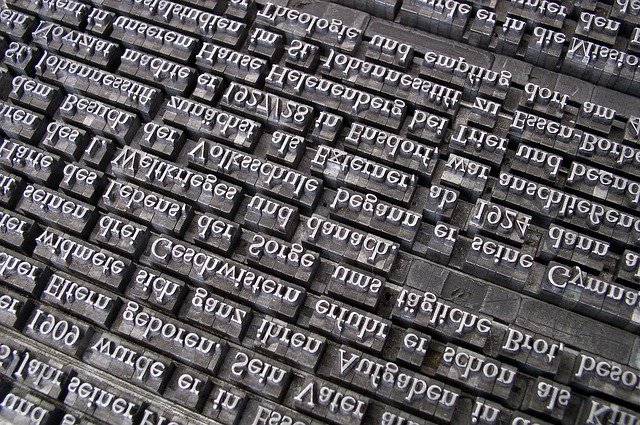
圖片來源:Willi Heidelbach,來自 Pixabay
下載資料集,並檢閱裡面的檔案
fonts_zip = tf.keras.utils.get_file(
    'fonts.zip',  "https://archive.ics.uci.edu/ml/machine-learning-databases/00417/fonts.zip",
    cache_dir='.', cache_subdir='fonts',
    extract=True)
Downloading data from https://archive.ics.uci.edu/ml/machine-learning-databases/00417/fonts.zip
159481856/Unknown 4s 0us/step
import pathlib
font_csvs =  sorted(str(p) for p in pathlib.Path('fonts').glob("*.csv"))

font_csvs[:10]
['fonts/AGENCY.csv',
 'fonts/ARIAL.csv',
 'fonts/BAITI.csv',
 'fonts/BANKGOTHIC.csv',
 'fonts/BASKERVILLE.csv',
 'fonts/BAUHAUS.csv',
 'fonts/BELL.csv',
 'fonts/BERLIN.csv',
 'fonts/BERNARD.csv',
 'fonts/BITSTREAMVERA.csv']
len(font_csvs)
153
處理大量檔案時,您可以將 glob 樣式的 file_pattern 傳遞至 tf.data.experimental.make_csv_dataset 函數。檔案的順序會在每次反覆運算時隨機排序。
使用 num_parallel_reads 引數來設定平行讀取和交錯在一起的檔案數量。
fonts_ds = tf.data.experimental.make_csv_dataset(
    file_pattern = "fonts/*.csv",
    batch_size=10, num_epochs=1,
    num_parallel_reads=20,
    shuffle_buffer_size=10000)
這些 CSV 檔案已將圖片攤平到單一資料列中。資料行名稱的格式為 r{row}c{column}。以下是第一個批次
for features in fonts_ds.take(1):
  for i, (name, value) in enumerate(features.items()):
    if i>15:
      break
    print(f"{name:20s}: {value}")
print('...')
print(f"[total: {len(features)} features]")
font                : [b'BODONI' b'PHAGSPA' b'PLAYBILL' b'EDWARDIAN' b'EDWARDIAN' b'BOOK'
 b'HAETTENSCHWEILER' b'CENTAUR' b'CENTAUR' b'LEELAWADEE']
fontVariant         : [b'BODONI MT POSTER COMPRESSED' b'MICROSOFT PHAGSPA' b'PLAYBILL'
 b'EDWARDIAN SCRIPT ITC' b'EDWARDIAN SCRIPT ITC' b'BOOK ANTIQUA'
 b'HAETTENSCHWEILER' b'CENTAUR' b'CENTAUR' b'LEELAWADEE UI SEMILIGHT']
m_label             : [ 114 8254   93  100  710 1084 1025 8224  338 9723]
strength            : [0.4 0.4 0.4 0.4 0.4 0.4 0.4 0.4 0.4 0.4]
italic              : [1 0 1 0 1 0 0 0 1 0]
orientation         : [0. 0. 0. 0. 0. 0. 0. 0. 0. 0.]
m_top               : [47 40 30 44 49 53 27 33 34 50]
m_left              : [20 20 20 23 46 21 21 21 28 29]
originalH           : [35  4 56 34  8 31 55 53 44 39]
originalW           : [27 28 28 32 16 44 20 19 68 39]
h                   : [20 20 20 20 20 20 20 20 20 20]
w                   : [20 20 20 20 20 20 20 20 20 20]
r0c0                : [  1 255   1   1   0 255   1   1   1 255]
r0c1                : [  1 255   1   1   0 255   1   1   1 255]
r0c2                : [  1 255   1   1   0 255   1   1   1 255]
r0c3                : [  1 255   1   1   0 255 163   1   1 255]
...
[total: 412 features]
2024-07-13 05:32:17.807571: W tensorflow/core/framework/local_rendezvous.cc:404] Local rendezvous is aborting with status: OUT_OF_RANGE: End of sequence
選用:封裝欄位
您可能不想像這樣使用個別資料行中的每個像素。在嘗試使用此資料集之前,請務必將像素封裝到圖片張量中。
以下程式碼剖析資料行名稱,以針對每個範例建構圖片
import re

def make_images(features):
  image = [None]*400
  new_feats = {}

  for name, value in features.items():
    match = re.match('r(\d+)c(\d+)', name)
    if match:
      image[int(match.group(1))*20+int(match.group(2))] = value
    else:
      new_feats[name] = value

  image = tf.stack(image, axis=0)
  image = tf.reshape(image, [20, 20, -1])
  new_feats['image'] = image

  return new_feats
將該函數套用至資料集中的每個批次
fonts_image_ds = fonts_ds.map(make_images)

for features in fonts_image_ds.take(1):
  break
繪製產生的圖片
from matplotlib import pyplot as plt

plt.figure(figsize=(6,6), dpi=120)

for n in range(9):
  plt.subplot(3,3,n+1)
  plt.imshow(features['image'][..., n])
  plt.title(chr(features['m_label'][n]))
  plt.axis('off')
較低層級的函數
到目前為止,本教學課程著重於讀取 CSV 資料的最高層級公用程式。如果您的使用情況不符合基本模式,則還有兩個其他 API 可能對進階使用者有所幫助。
tf.io.decode_csv:用於將文字行剖析為 CSV 資料行張量清單的函數。tf.data.experimental.CsvDataset:較低層級的 CSV 資料集建構函式。
本節重新建立 tf.data.experimental.make_csv_dataset 提供的功能,以示範如何使用這種較低層級的功能。
tf.io.decode_csv
此函數會將字串或字串清單解碼為資料行清單。
與 tf.data.experimental.make_csv_dataset 不同,此函數不會嘗試猜測資料行資料類型。您可以使用提供 record_defaults 清單 (包含每個資料行正確類型的值) 的方式來指定資料行類型。
若要使用 tf.io.decode_csv 將鐵達尼號資料讀取為字串,您可以說:
text = pathlib.Path(titanic_file_path).read_text()
lines = text.split('\n')[1:-1]

all_strings = [str()]*10
all_strings
['', '', '', '', '', '', '', '', '', '']
features = tf.io.decode_csv(lines, record_defaults=all_strings)

for f in features:
  print(f"type: {f.dtype.name}, shape: {f.shape}")
type: string, shape: (627,)
type: string, shape: (627,)
type: string, shape: (627,)
type: string, shape: (627,)
type: string, shape: (627,)
type: string, shape: (627,)
type: string, shape: (627,)
type: string, shape: (627,)
type: string, shape: (627,)
type: string, shape: (627,)
若要使用其實際類型剖析它們,請建立對應類型的 record_defaults 清單
print(lines[0])
0,male,22.0,1,0,7.25,Third,unknown,Southampton,n
titanic_types = [int(), str(), float(), int(), int(), float(), str(), str(), str(), str()]
titanic_types
[0, '', 0.0, 0, 0, 0.0, '', '', '', '']
features = tf.io.decode_csv(lines, record_defaults=titanic_types)

for f in features:
  print(f"type: {f.dtype.name}, shape: {f.shape}")
type: int32, shape: (627,)
type: string, shape: (627,)
type: float32, shape: (627,)
type: int32, shape: (627,)
type: int32, shape: (627,)
type: float32, shape: (627,)
type: string, shape: (627,)
type: string, shape: (627,)
type: string, shape: (627,)
type: string, shape: (627,)
tf.data.experimental.CsvDataset
tf.data.experimental.CsvDataset 類別提供最小的 CSV Dataset 介面,而沒有 tf.data.experimental.make_csv_dataset 函數的便利功能:資料行標題剖析、資料行類型推斷、自動隨機排序、檔案交錯。
此建構函式使用 record_defaults,方式與 tf.io.decode_csv 相同
simple_titanic = tf.data.experimental.CsvDataset(titanic_file_path, record_defaults=titanic_types, header=True)

for example in simple_titanic.take(1):
  print([e.numpy() for e in example])
[0, b'male', 22.0, 1, 0, 7.25, b'Third', b'unknown', b'Southampton', b'n']
2024-07-13 05:32:20.987770: W tensorflow/core/framework/local_rendezvous.cc:404] Local rendezvous is aborting with status: OUT_OF_RANGE: End of sequence
上述程式碼基本上等同於
def decode_titanic_line(line):
  return tf.io.decode_csv(line, titanic_types)

manual_titanic = (
    # Load the lines of text
    tf.data.TextLineDataset(titanic_file_path)
    # Skip the header row.
    .skip(1)
    # Decode the line.
    .map(decode_titanic_line)
)

for example in manual_titanic.take(1):
  print([e.numpy() for e in example])
[0, b'male', 22.0, 1, 0, 7.25, b'Third', b'unknown', b'Southampton', b'n']
2024-07-13 05:32:21.082269: W tensorflow/core/framework/local_rendezvous.cc:404] Local rendezvous is aborting with status: OUT_OF_RANGE: End of sequence
多個檔案
若要使用 tf.data.experimental.CsvDataset 剖析字型資料集,您首先需要判斷 record_defaults 的資料行類型。先檢查一個檔案的第一列
font_line = pathlib.Path(font_csvs[0]).read_text().splitlines()[1]
print(font_line)
AGENCY,AGENCY FB,64258,0.400000,0,0.000000,35,21,51,22,20,20,1,1,1,21,101,210,255,255,255,255,255,255,255,255,255,255,255,255,255,255,1,1,1,93,255,255,255,176,146,146,146,146,146,146,146,146,216,255,255,255,1,1,1,93,255,255,255,70,1,1,1,1,1,1,1,1,163,255,255,255,1,1,1,93,255,255,255,70,1,1,1,1,1,1,1,1,163,255,255,255,1,1,1,93,255,255,255,70,1,1,1,1,1,1,1,1,163,255,255,255,1,1,1,93,255,255,255,70,1,1,1,1,1,1,1,1,163,255,255,255,1,1,1,93,255,255,255,70,1,1,1,1,1,1,1,1,163,255,255,255,141,141,141,182,255,255,255,172,141,141,141,115,1,1,1,1,163,255,255,255,255,255,255,255,255,255,255,255,255,255,255,209,1,1,1,1,163,255,255,255,6,6,6,96,255,255,255,74,6,6,6,5,1,1,1,1,163,255,255,255,1,1,1,93,255,255,255,70,1,1,1,1,1,1,1,1,163,255,255,255,1,1,1,93,255,255,255,70,1,1,1,1,1,1,1,1,163,255,255,255,1,1,1,93,255,255,255,70,1,1,1,1,1,1,1,1,163,255,255,255,1,1,1,93,255,255,255,70,1,1,1,1,1,1,1,1,163,255,255,255,1,1,1,93,255,255,255,70,1,1,1,1,1,1,1,1,163,255,255,255,1,1,1,93,255,255,255,70,1,1,1,1,1,1,1,1,163,255,255,255,1,1,1,93,255,255,255,70,1,1,1,1,1,1,1,1,163,255,255,255,1,1,1,93,255,255,255,70,1,1,1,1,1,1,1,1,163,255,255,255,1,1,1,93,255,255,255,70,1,1,1,1,1,1,1,1,163,255,255,255,1,1,1,93,255,255,255,70,1,1,1,1,1,1,1,1,163,255,255,255
只有前兩個欄位是字串,其餘都是整數或浮點數,您可以透過計算逗號來取得特徵總數
num_font_features = font_line.count(',')+1
font_column_types = [str(), str()] + [float()]*(num_font_features-2)
tf.data.experimental.CsvDataset 建構函式可以接受輸入檔案清單,但會依序讀取它們。CSV 清單中的第一個檔案是 AGENCY.csv
font_csvs[0]
'fonts/AGENCY.csv'
因此,當您將檔案清單傳遞至 CsvDataset 時,會先讀取 AGENCY.csv 中的記錄
simple_font_ds = tf.data.experimental.CsvDataset(
    font_csvs,
    record_defaults=font_column_types,
    header=True)
for row in simple_font_ds.take(10):
  print(row[0].numpy())
b'AGENCY'
b'AGENCY'
b'AGENCY'
b'AGENCY'
b'AGENCY'
b'AGENCY'
b'AGENCY'
b'AGENCY'
b'AGENCY'
b'AGENCY'
2024-07-13 05:32:21.216095: W tensorflow/core/framework/local_rendezvous.cc:404] Local rendezvous is aborting with status: OUT_OF_RANGE: End of sequence
若要交錯多個檔案,請使用 Dataset.interleave。
以下是一個初始資料集,其中包含 CSV 檔案名稱
font_files = tf.data.Dataset.list_files("fonts/*.csv")
這會在每個週期隨機排序檔案名稱
print('Epoch 1:')
for f in list(font_files)[:5]:
  print("    ", f.numpy())
print('    ...')
print()

print('Epoch 2:')
for f in list(font_files)[:5]:
  print("    ", f.numpy())
print('    ...')
Epoch 1:
     b'fonts/GIGI.csv'
     b'fonts/NUMERICS.csv'
     b'fonts/COPPERPLATE.csv'
     b'fonts/PHAGSPA.csv'
     b'fonts/ROMAN.csv'
    ...

Epoch 2:
     b'fonts/MV_BOLI.csv'
     b'fonts/PROXY.csv'
     b'fonts/MONOTXT.csv'
     b'fonts/MAIANDRA.csv'
     b'fonts/PALACE.csv'
    ...
2024-07-13 05:32:21.557274: W tensorflow/core/framework/local_rendezvous.cc:404] Local rendezvous is aborting with status: OUT_OF_RANGE: End of sequence
2024-07-13 05:32:21.573293: W tensorflow/core/framework/local_rendezvous.cc:404] Local rendezvous is aborting with status: OUT_OF_RANGE: End of sequence
interleave 方法採用 map_func,其會為父系 Dataset 的每個元素建立子系 Dataset。
在這裡,您想要從檔案資料集的每個元素建立 tf.data.experimental.CsvDataset
def make_font_csv_ds(path):
  return tf.data.experimental.CsvDataset(
    path,
    record_defaults=font_column_types,
    header=True)
由 interleave 傳回的 Dataset 會透過循環瀏覽多個子系 Dataset 來傳回元素。請注意,在下方,資料集如何循環瀏覽 cycle_length=3 三個字型檔案
font_rows = font_files.interleave(make_font_csv_ds,
                                  cycle_length=3)
fonts_dict = {'font_name':[], 'character':[]}

for row in font_rows.take(10):
  fonts_dict['font_name'].append(row[0].numpy().decode())
  fonts_dict['character'].append(chr(int(row[2].numpy())))

pd.DataFrame(fonts_dict)
2024-07-13 05:32:21.931277: W tensorflow/core/framework/local_rendezvous.cc:404] Local rendezvous is aborting with status: OUT_OF_RANGE: End of sequence
效能
先前已注意到,當在字串批次上執行時,tf.io.decode_csv 會更有效率。
當使用大型批次大小時,可以利用此事實來改善 CSV 載入效能 (但請先嘗試快取)。
使用內建載入器時,20 個 2048 個範例的批次大約需要 17 秒。
BATCH_SIZE=2048
fonts_ds = tf.data.experimental.make_csv_dataset(
    file_pattern = "fonts/*.csv",
    batch_size=BATCH_SIZE, num_epochs=1,
    num_parallel_reads=100)
%%time
for i,batch in enumerate(fonts_ds.take(20)):
  print('.',end='')

print()
....................
CPU times: user 44.6 s, sys: 4.21 s, total: 48.9 s
Wall time: 20.6 s
2024-07-13 05:32:43.296482: W tensorflow/core/framework/local_rendezvous.cc:404] Local rendezvous is aborting with status: OUT_OF_RANGE: End of sequence
將文字行批次傳遞至 decode_csv 的執行速度更快,大約 5 秒
fonts_files = tf.data.Dataset.list_files("fonts/*.csv")
fonts_lines = fonts_files.interleave(
    lambda fname:tf.data.TextLineDataset(fname).skip(1),
    cycle_length=100).batch(BATCH_SIZE)

fonts_fast = fonts_lines.map(lambda x: tf.io.decode_csv(x, record_defaults=font_column_types))
%%time
for i,batch in enumerate(fonts_fast.take(20)):
  print('.',end='')

print()
....................
CPU times: user 3.35 s, sys: 111 ms, total: 3.47 s
Wall time: 752 ms
2024-07-13 05:32:44.690941: W tensorflow/core/framework/local_rendezvous.cc:404] Local rendezvous is aborting with status: OUT_OF_RANGE: End of sequence
如需透過使用大型批次來提高 CSV 效能的另一個範例,請參閱過度擬合與擬合不足教學課程。
這種方法可能有效,但請考慮其他選項,例如 Dataset.cache 和 tf.data.Dataset.snapshot,或將您的資料重新編碼為更精簡的格式。