
圖片分類是機器學習的常見用途,用於識別圖片所代表的事物。例如,我們可能想知道給定的圖片中出現哪種動物。預測圖片代表的事物的任務稱為圖片分類。圖片分類器經過訓練,可辨識各種圖片類別。例如,模型可能經過訓練,可辨識代表三種不同動物類型的相片:兔子、倉鼠和狗。如需圖片分類器的詳細資訊,請參閱圖片分類總覽。
使用工作程式庫 ImageClassifier API,將您的自訂圖片分類器或預先訓練的分類器部署到您的行動應用程式中。
ImageClassifier API 的主要功能
輸入圖片處理,包括旋轉、調整大小和色彩空間轉換。
輸入圖片的感興趣區域。
標籤對應表語言代碼。
用於篩選結果的分數閾值。
前 k 個分類結果。
標籤允許清單和拒絕清單。
支援的圖片分類器模型
以下模型保證與 ImageClassifier API 相容。
符合模型相容性需求的自訂模型。
在 Java 中執行推論
如需如何在 Android 應用程式中使用 ImageClassifier 的範例,請參閱圖片分類參考應用程式。
步驟 1:匯入 Gradle 依附元件和其他設定
將 .tflite 模型檔案複製到將執行模型的 Android 模組的 assets 目錄。指定不應壓縮檔案,並將 TensorFlow Lite 程式庫新增至模組的 build.gradle 檔案
android {
    // Other settings

    // Specify tflite file should not be compressed for the app apk
    aaptOptions {
        noCompress "tflite"
    }
}

dependencies {
    // Other dependencies

    // Import the Task Vision Library dependency (NNAPI is included)
    implementation 'org.tensorflow:tensorflow-lite-task-vision'
    // Import the GPU delegate plugin Library for GPU inference
    implementation 'org.tensorflow:tensorflow-lite-gpu-delegate-plugin'
}
步驟 2:使用模型
// Initialization
ImageClassifierOptions options =
    ImageClassifierOptions.builder()
        .setBaseOptions(BaseOptions.builder().useGpu().build())
        .setMaxResults(1)
        .build();
ImageClassifier imageClassifier =
    ImageClassifier.createFromFileAndOptions(
        context, modelFile, options);

// Run inference
List<Classifications> results = imageClassifier.classify(image);
如需設定 ImageClassifier 的更多選項,請參閱原始碼和 javadoc。
在 iOS 中執行推論
步驟 1:安裝依附元件
工作程式庫支援使用 CocoaPods 安裝。請確認您的系統上已安裝 CocoaPods。如需操作說明,請參閱CocoaPods 安裝指南。
如需將 Pod 新增至 Xcode 專案的詳細資訊,請參閱CocoaPods 指南。
在 Podfile 中新增 TensorFlowLiteTaskVision Pod。
target 'MyAppWithTaskAPI' do
  use_frameworks!
  pod 'TensorFlowLiteTaskVision'
end
請確認您將用於推論的 .tflite 模型存在於您的應用程式套件中。
步驟 2:使用模型
Swift
// Imports
import TensorFlowLiteTaskVision

// Initialization
guard let modelPath = Bundle.main.path(forResource: "birds_V1",
                                            ofType: "tflite") else { return }

let options = ImageClassifierOptions(modelPath: modelPath)

// Configure any additional options:
// options.classificationOptions.maxResults = 3

let classifier = try ImageClassifier.classifier(options: options)

// Convert the input image to MLImage.
// There are other sources for MLImage. For more details, please see:
// https://developers.google.com/ml-kit/reference/ios/mlimage/api/reference/Classes/GMLImage
guard let image = UIImage (named: "sparrow.jpg"), let mlImage = MLImage(image: image) else { return }

// Run inference
let classificationResults = try classifier.classify(mlImage: mlImage)
Objective C
// Imports
#import <TensorFlowLiteTaskVision/TensorFlowLiteTaskVision.h>

// Initialization
NSString *modelPath = [[NSBundle mainBundle] pathForResource:@"birds_V1" ofType:@"tflite"];

TFLImageClassifierOptions *options =
    [[TFLImageClassifierOptions alloc] initWithModelPath:modelPath];

// Configure any additional options:
// options.classificationOptions.maxResults = 3;

TFLImageClassifier *classifier = [TFLImageClassifier imageClassifierWithOptions:options
                                                                          error:nil];

// Convert the input image to MLImage.
UIImage *image = [UIImage imageNamed:@"sparrow.jpg"];

// There are other sources for GMLImage. For more details, please see:
// https://developers.google.com/ml-kit/reference/ios/mlimage/api/reference/Classes/GMLImage
GMLImage *gmlImage = [[GMLImage alloc] initWithImage:image];

// Run inference
TFLClassificationResult *classificationResult =
    [classifier classifyWithGMLImage:gmlImage error:nil];
如需設定 TFLImageClassifier 的更多選項,請參閱原始碼。
在 Python 中執行推論
步驟 1:安裝 pip 套件
pip install tflite-support
步驟 2:使用模型
# Imports
from tflite_support.task import vision
from tflite_support.task import core
from tflite_support.task import processor

# Initialization
base_options = core.BaseOptions(file_name=model_path)
classification_options = processor.ClassificationOptions(max_results=2)
options = vision.ImageClassifierOptions(base_options=base_options, classification_options=classification_options)
classifier = vision.ImageClassifier.create_from_options(options)

# Alternatively, you can create an image classifier in the following manner:
# classifier = vision.ImageClassifier.create_from_file(model_path)

# Run inference
image = vision.TensorImage.create_from_file(image_path)
classification_result = classifier.classify(image)
如需設定 ImageClassifier 的更多選項,請參閱原始碼。
在 C++ 中執行推論
// Initialization
ImageClassifierOptions options;
options.mutable_base_options()->mutable_model_file()->set_file_name(model_path);
std::unique_ptr<ImageClassifier> image_classifier = ImageClassifier::CreateFromOptions(options).value();

// Create input frame_buffer from your inputs, `image_data` and `image_dimension`.
// See more information here: tensorflow_lite_support/cc/task/vision/utils/frame_buffer_common_utils.h

std::unique_ptr<FrameBuffer> frame_buffer = CreateFromRgbRawBuffer(
      image_data, image_dimension);

// Run inference
const ClassificationResult result = image_classifier->Classify(*frame_buffer).value();
如需設定 ImageClassifier 的更多選項,請參閱原始碼。
範例結果
以下是鳥類分類器的分類結果範例。
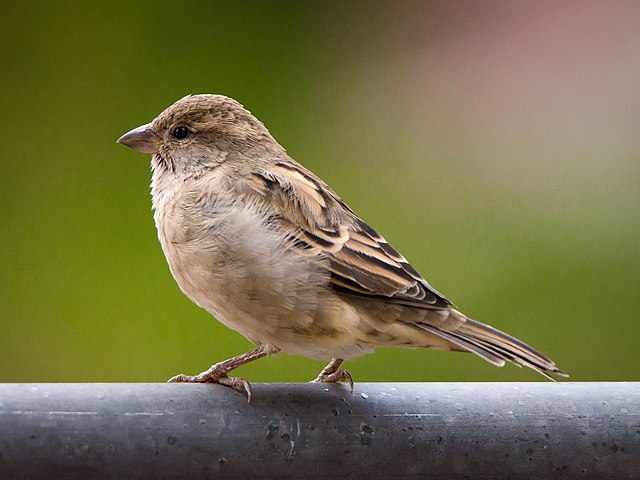
Results:
  Rank #0:
   index       : 671
   score       : 0.91406
   class name  : /m/01bwb9
   display name: Passer domesticus
  Rank #1:
   index       : 670
   score       : 0.00391
   class name  : /m/01bwbt
   display name: Passer montanus
  Rank #2:
   index       : 495
   score       : 0.00391
   class name  : /m/0bwm6m
   display name: Passer italiae
使用您自己的模型和測試資料,試用適用於 ImageClassifier 的簡易 CLI 示範工具。
模型相容性需求
ImageClassifier API 預期 TFLite 模型具有必要的 TFLite 模型中繼資料。如需使用 TensorFlow Lite Metadata Writer API 建立圖片分類器中繼資料的範例,請參閱相關說明。
相容的圖片分類器模型應符合下列需求
輸入圖片張量 (kTfLiteUInt8/kTfLiteFloat32)
- 大小為
[batch x height x width x channels]的圖片輸入。 - 不支援批次推論 (
batch必須為 1)。 - 僅支援 RGB 輸入 (
channels必須為 3)。 - 如果類型為 kTfLiteFloat32,則中繼資料必須附加 NormalizationOptions 以進行輸入正規化。
- 大小為
輸出分數張量 (kTfLiteUInt8/kTfLiteFloat32)
- 具有
N個類別且維度為 2 或 4,即[1 x N]或[1 x 1 x 1 x N] - 選用 (但建議使用) 標籤對應表,以 AssociatedFile 形式提供,類型為 TENSOR_AXIS_LABELS,每行包含一個標籤。請參閱 標籤檔案範例。第一個此類 AssociatedFile (如果有的話) 用於填寫結果的
label欄位 (在 C++ 中命名為class_name)。display_name欄位從 AssociatedFile (如果有的話) 填寫,其語言代碼與建立時使用的ImageClassifierOptions的display_names_locale欄位 (預設為「en」,即英文) 相符。如果這些都不可用,則只會填寫結果的index欄位。
- 具有