|
|
|
 在 GitHub 上檢視原始碼 在 GitHub 上檢視原始碼
|
|
總覽
在電腦視覺中,選取的色彩空間可能會對模型的效能產生重大影響。雖然 RGB 是最常見的色彩空間,但在許多情況下,切換到替代色彩空間 (例如 YUV、YCbCr、XYZ (CIE) 等) 時,模型效能會更好。
tensorflow-io 套件提供了一系列色彩空間轉換 API,可用於準備和擴增影像資料。
設定
安裝所需的套件,然後重新啟動執行階段
pip install -q tensorflow-io
下載範例圖片
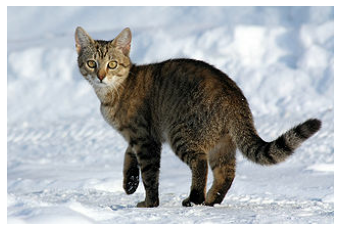
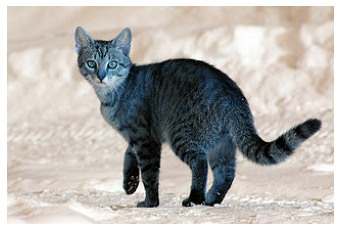
本教學課程中使用的圖片範例是雪地裡的貓,但您可以換成任何 JPEG 圖片。
以下步驟將下載圖片並以 sample.jpg 的名稱儲存到本機磁碟
curl -o sample.jpg -L https://storage.googleapis.com/download.tensorflow.org/example_images/320px-Felis_catus-cat_on_snow.jpgls -ls sample.jpg
% Total    % Received % Xferd  Average Speed   Time    Time     Time  Current
                                 Dload  Upload   Total   Spent    Left  Speed
100 17858  100 17858    0     0   235k      0 --:--:-- --:--:-- --:--:--  235k
20 -rw-rw-r-- 1 kbuilder kokoro 17858 Oct 27 16:33 sample.jpg
用法
讀取影像檔案
將影像讀取並解碼為形狀為 (213, 320, 3) 的 uint8 張量
import tensorflow as tf
import tensorflow_io as tfio

image = tf.image.decode_jpeg(tf.io.read_file('sample.jpg'))

print(image.shape, image.dtype)
(213, 320, 3) <dtype: 'uint8'>
影像可以透過以下方式顯示
import matplotlib.pyplot as plt

plt.figure()
plt.imshow(image)
plt.axis('off')
plt.show()
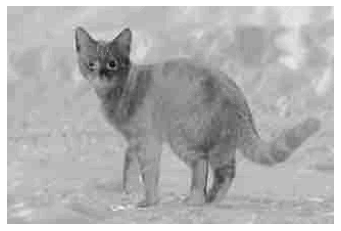
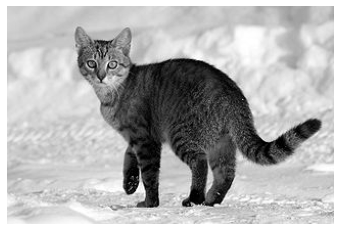
將 RGB 轉換為灰階
可以將 RGB 影像轉換為 Grayscale,使用 tfio.experimental.color.rgb_to_grayscale 將通道從 3 減少到 1
grayscale = tfio.experimental.color.rgb_to_grayscale(image)

print(grayscale.shape, grayscale.dtype)

# use tf.squeeze to remove last channel for plt.imshow to display:
plt.figure()
plt.imshow(tf.squeeze(grayscale, axis=-1), cmap='gray')
plt.axis('off')
plt.show()
(213, 320, 1) <dtype: 'uint8'>
將 RGB 轉換為 BGR
某些影像軟體和相機製造商可能偏好 BGR,這可以透過 tfio.experimental.color.rgb_to_bgr 取得
bgr = tfio.experimental.color.rgb_to_bgr(image)

print(bgr.shape, bgr.dtype)

plt.figure()
plt.imshow(bgr)
plt.axis('off')
plt.show()
(213, 320, 3) <dtype: 'uint8'>
將 RGB 轉換為 CIE XYZ
CIE XYZ (或 CIE 1931 XYZ) 是許多影像處理程式中常用的色彩空間。以下是透過 tfio.experimental.color.rgb_to_xyz 從 RGB 轉換為 CIE XYZ 的範例。請注意,tfio.experimental.color.rgb_to_xyz 假設浮點輸入的範圍為 [0, 1],因此需要額外的前處理
# convert to float32
image_float32 = tf.cast(image, tf.float32) / 255.0

xyz_float32 = tfio.experimental.color.rgb_to_xyz(image_float32)

# convert back uint8
xyz = tf.cast(xyz_float32 * 255.0, tf.uint8)

print(xyz.shape, xyz.dtype)

plt.figure()
plt.imshow(xyz)
plt.axis('off')
plt.show()
(213, 320, 3) <dtype: 'uint8'>

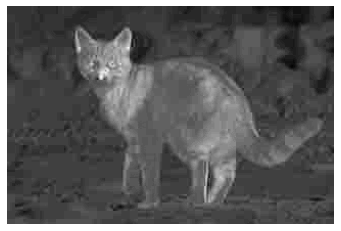
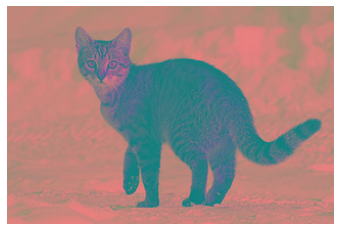
將 RGB 轉換為 YCbCr
最後,YCbCr 是許多視訊系統中的預設色彩空間。轉換為 YCbCr 可以透過 tfio.experimental.color.rgb_to_ycbcr 完成
ycbcr = tfio.experimental.color.rgb_to_ycbcr(image)

print(ycbcr.shape, ycbcr.dtype)

plt.figure()
plt.imshow(ycbcr, cmap='gray')
plt.axis('off')
plt.show()
(213, 320, 3) <dtype: 'uint8'>
但更有趣的是,YCbCr 可以分解為 Y' (亮度)、Cb (藍色差色度) 和 Cr (紅色差色度) 分量,每個分量都帶有感知上有意義的資訊
y, cb, cr = ycbcr[:,:,0], ycbcr[:,:,1], ycbcr[:,:,2]

# Y' component
plt.figure()
plt.imshow(y, cmap='gray')
plt.axis('off')
plt.show()

# Cb component
plt.figure()
plt.imshow(cb, cmap='gray')
plt.axis('off')
plt.show()

# Cr component
plt.figure()
plt.imshow(cr, cmap='gray')
plt.axis('off')
plt.show()